Job Manager for remote execution of QuantumATK scripts
In this tutorial you will learn how to use the Job Manager for execution of QuantumATK jobs on remote computing clusters. In particular, you will learn how to:
add a remote machine to the Computers/Jobs;
use custom Machine Settings for individual jobs;
add several different machines and import/export machine settings.
Important
You will set up a remote machine for running jobs in parallel using MPI, as well as with threading. We strongly recommend you go through the tutorial Job Manager for local execution of QuantumATK scripts before continuing with this one.
Note
There are two essential requirements when using the Job Manager for executing and managing QuantumATK jobs on a remote cluster. You need:
QuantumATK installed on the local machine and on the cluster;
an SSH connection from your local machine to the cluster.
Please refer to the tutorial SSH keys if you need help setting up the SSH connection.

A single remote machine
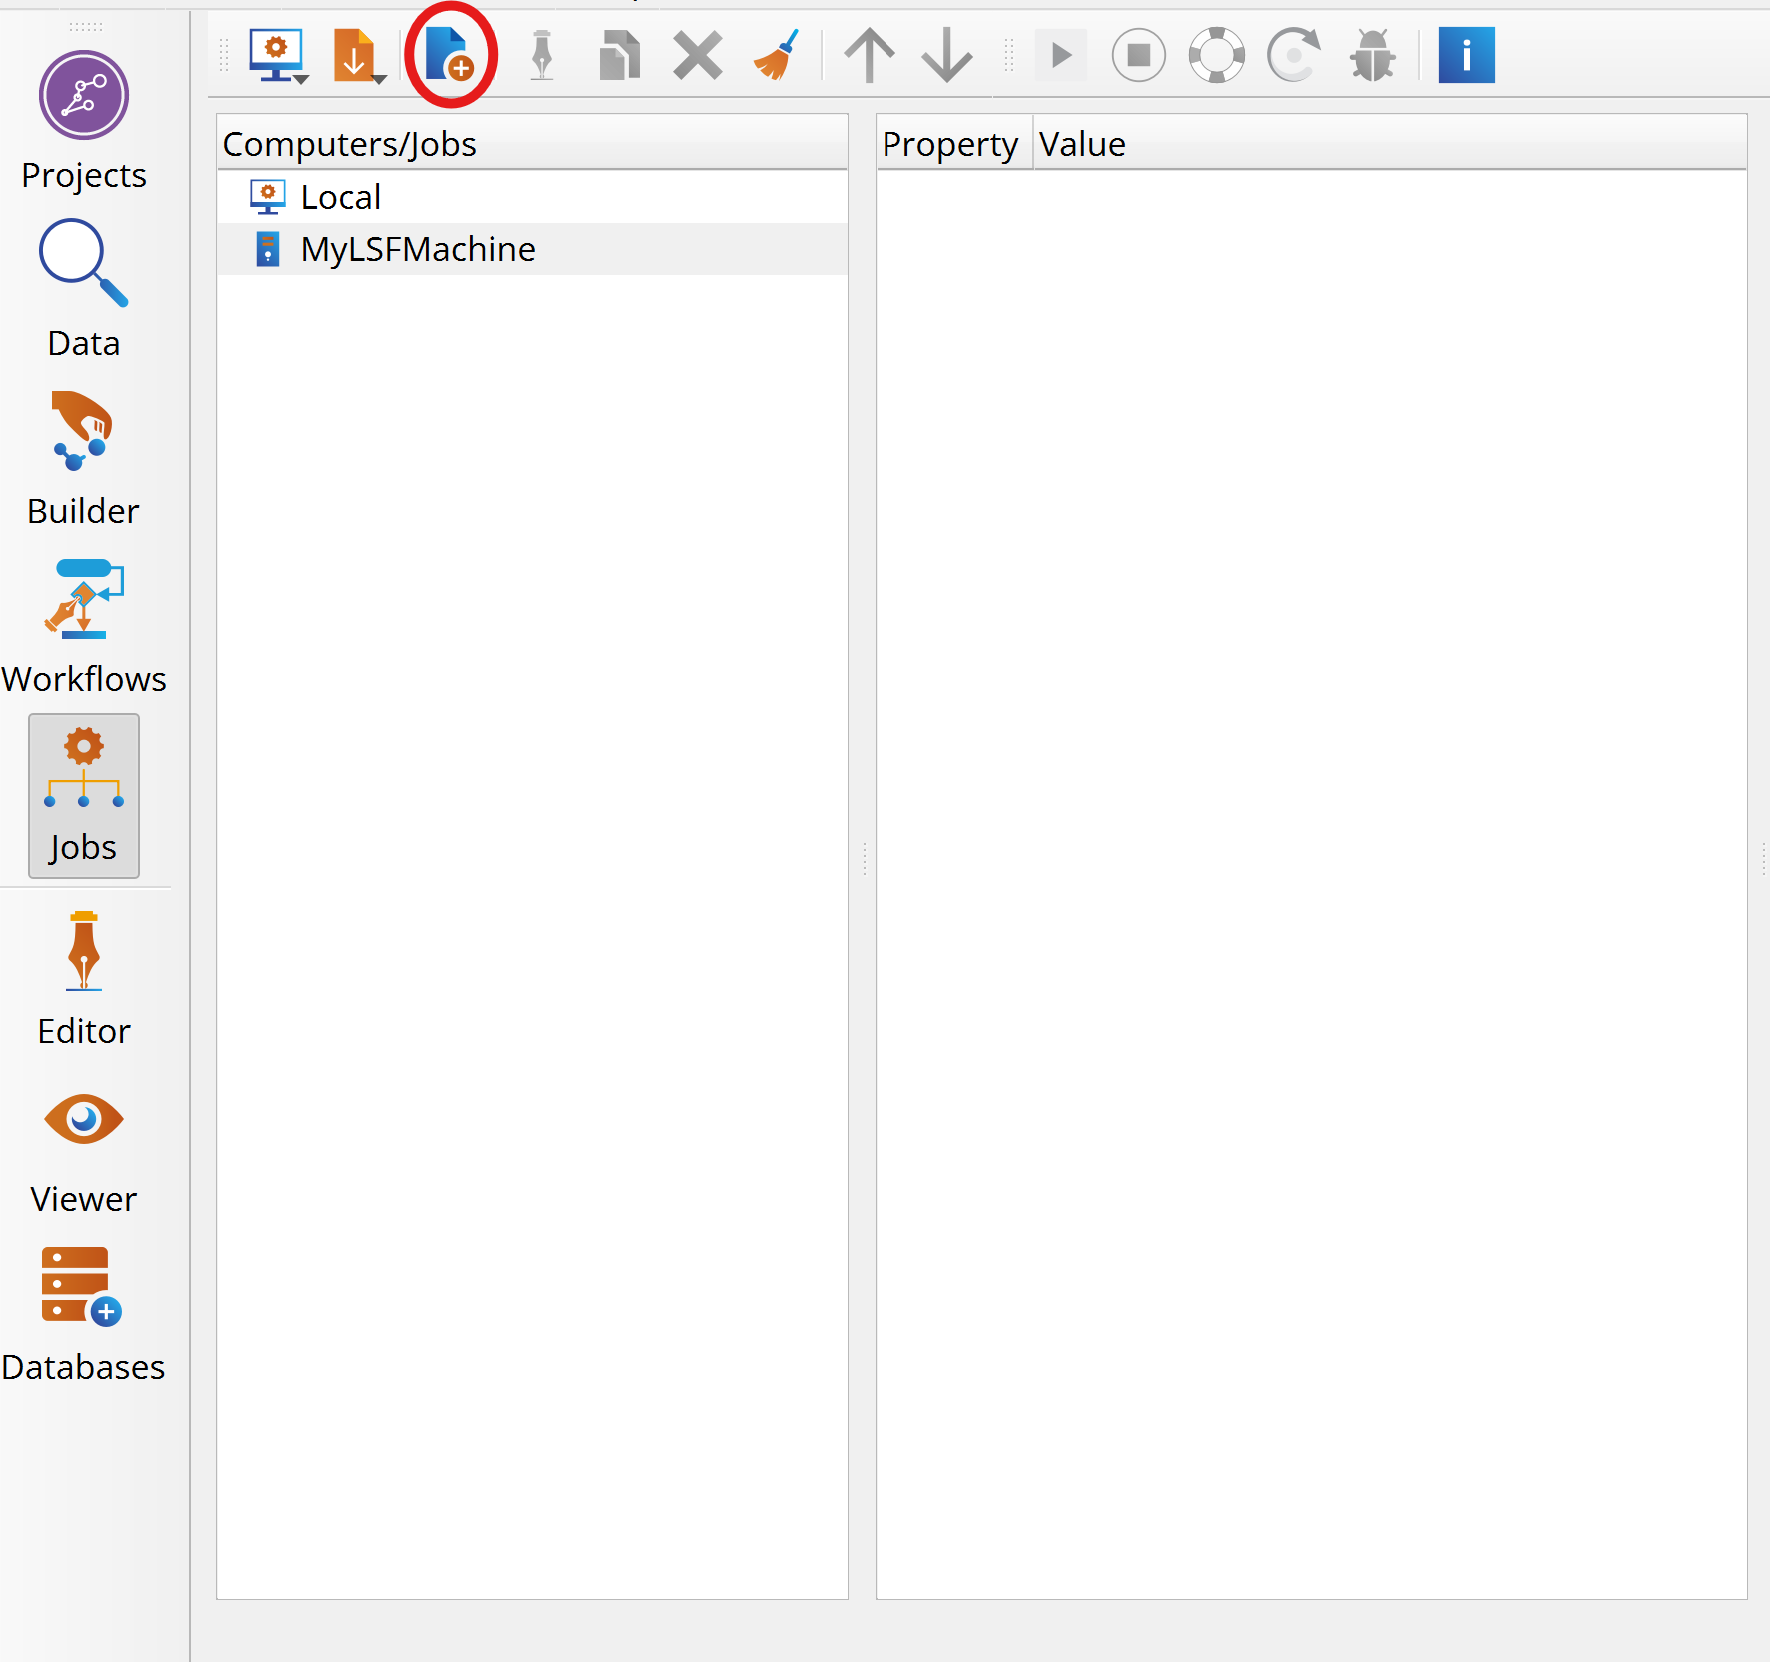
Click on the  Create computer to add a new machine.
![]()
The menu that appears has seven options, New DirectRemote, New Local, New LSF, New PBS, New PBSPro, New SGE and New SLURM,.
Choose the type of remote machine that matches the job scheduling on your remote Linux cluster, and start setting up the connection. Here, you will choose the New LSF machine to set up a machine with a LSF job scheduling system. The option New DirectRemote is appropriate for clusters that have no queue system.
The Computer Settings widget pops up. It has six main tabs:
Computer (Connection and script auto-start),
Environment (Paths and submission commands),
Queuing system (Settings and resources),
Job Settings (Default job settings),
Diagnostics (Verify the current setup),
Example script (Example submission script).
Computer
Connection to the remote cluster.
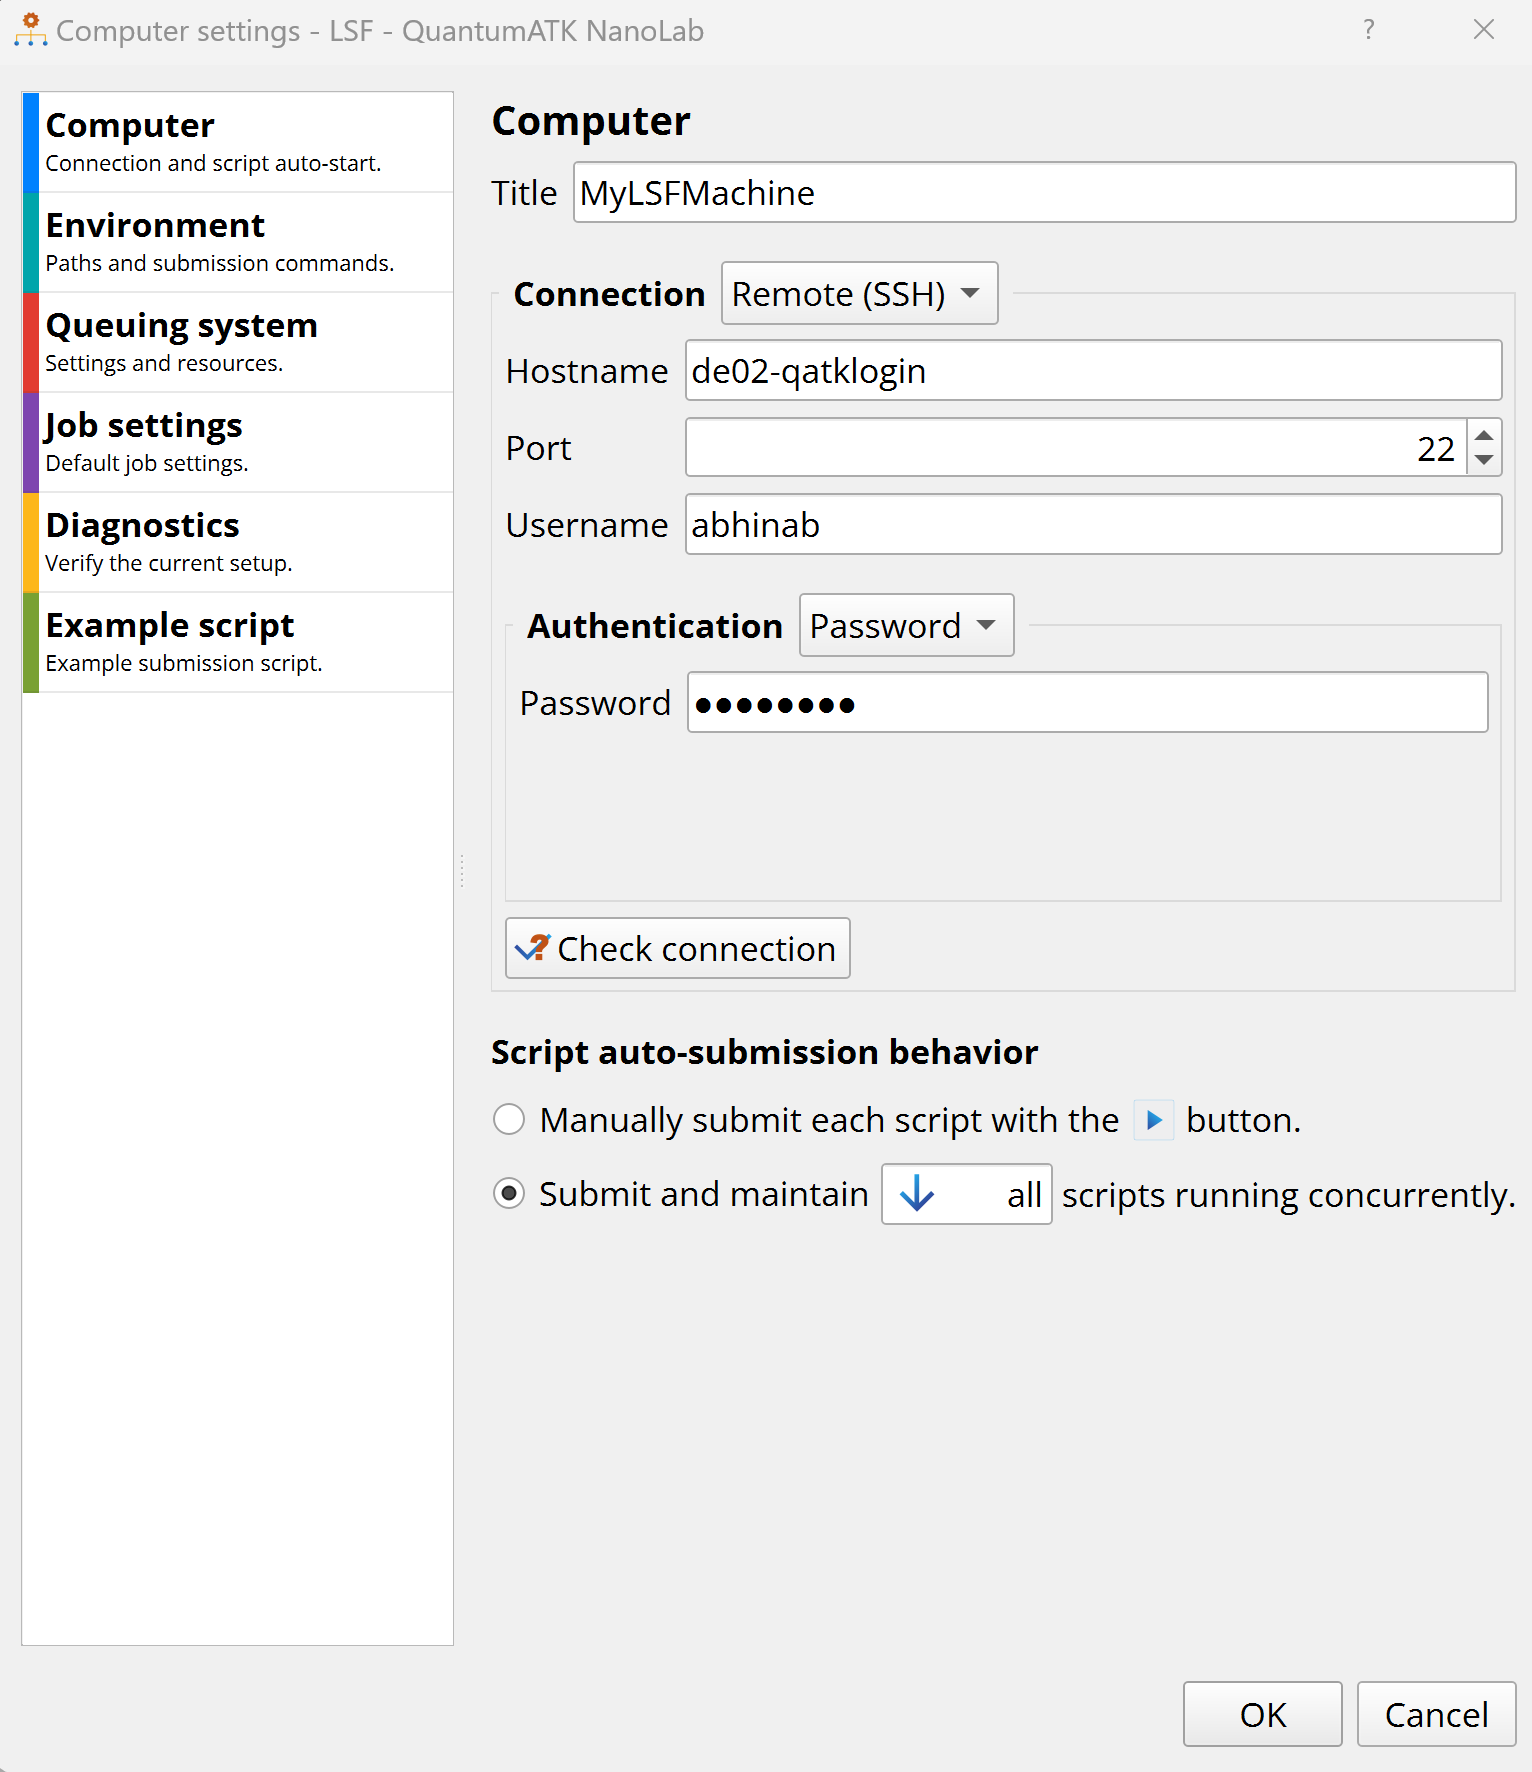
This tab is used to provide the credentials for connecting to the remote cluster of choice. It supports password-based and key-based authentication.
- Private key file
The path of your private SSH key, you might already have one or you can generate one following SSH keys.
Once all settings are added, you can check if they are correct by clicking the Check connection button.
Environment
Computing environment on the cluster.
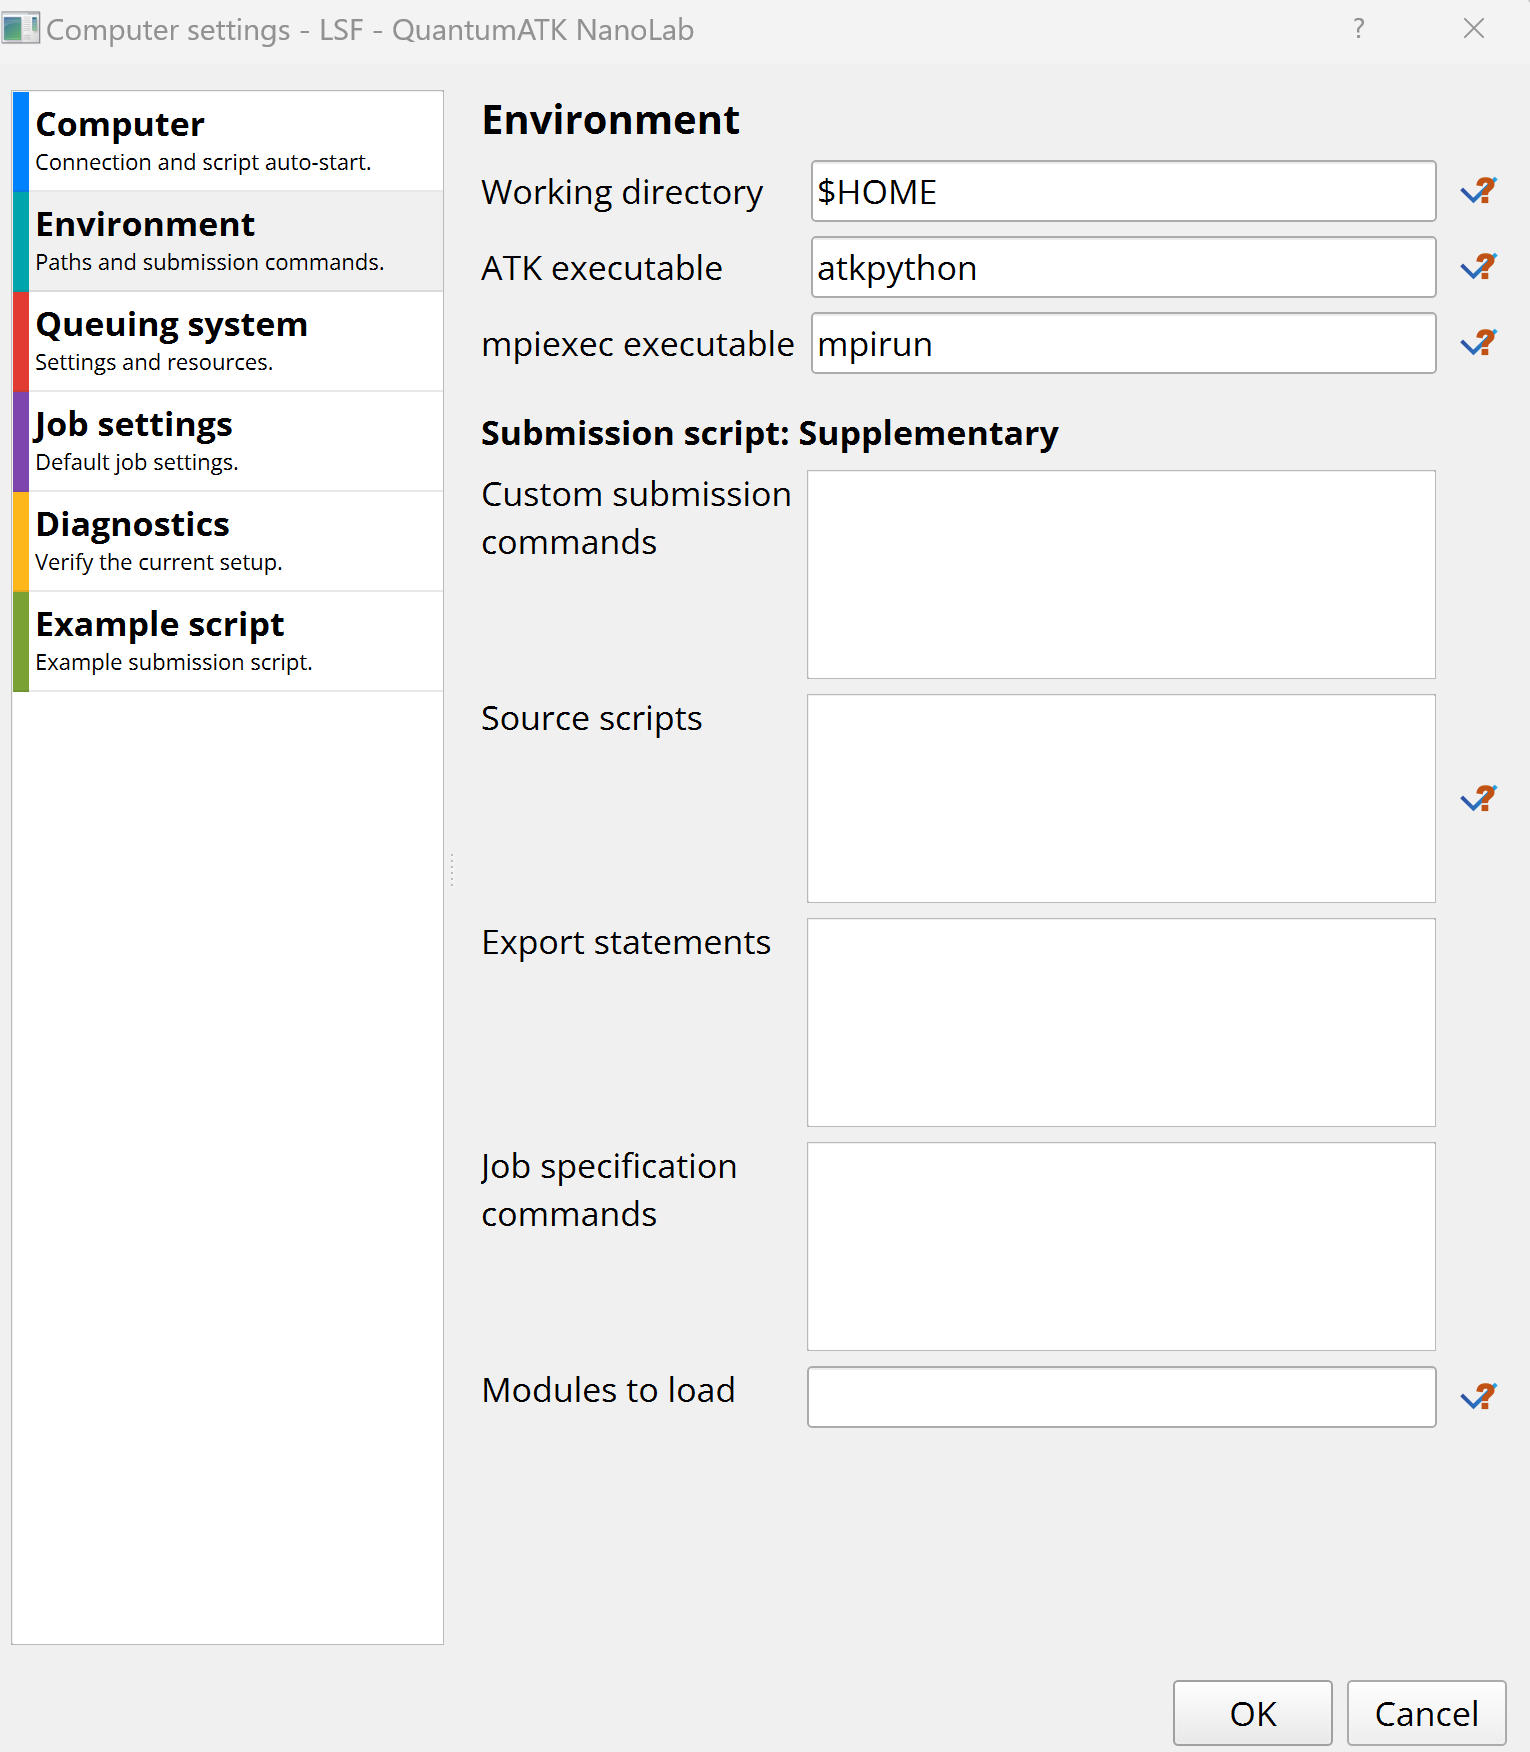
This tab concerns the environment (directories, executables, modules, etc.)
on the remote cluster, not on your local computer. $HOME is therefore the
home directory of your user on the cluster, and QuantumATK must of course be installed on
the cluster.
Any scripts that should be sourced in order to get the environment
working must be listed. The same goes for required export statements (may be
needed to correctly set the SNPSLMD_LICENSE_FILE) and cluster modules that
should be loaded using the module load command (https://modules.readthedocs.io).
You can also provide custom submission commands. For example, you can choose a particular queue to submit the job:
# Submit job to "myqueue" queue
BSUB -app myqueue
Queuing system
Queuing system settings and resources available for job submission.
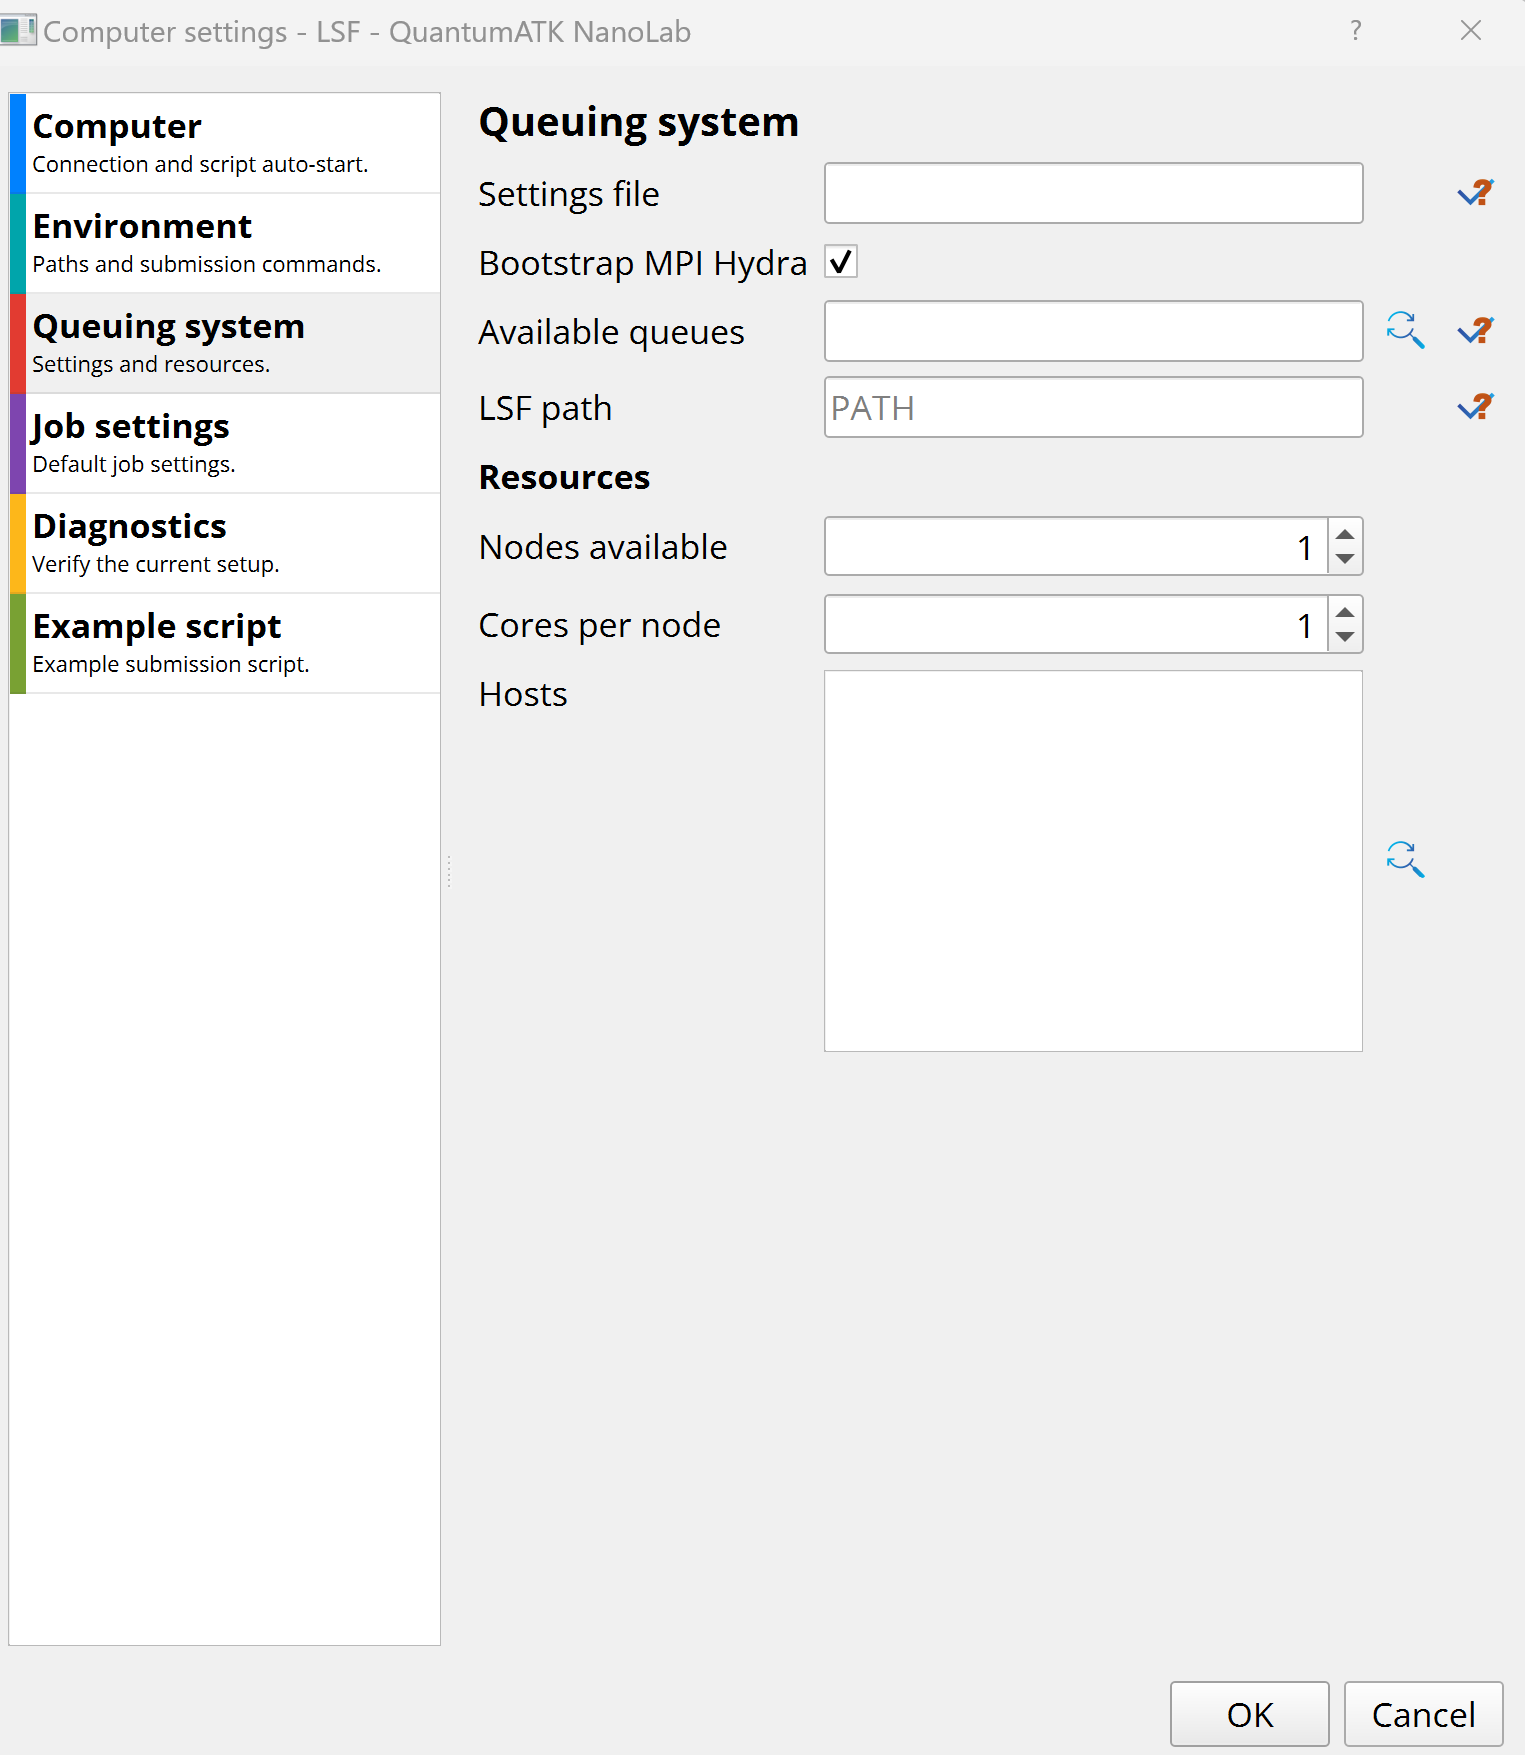
The nodes available and cores per node values are used to determine the default job settings.
- LSF path
This is the directory containing
bsuband other LSF executables. It is not needed if Settings File is provided. Log on to the cluster and use thewhich`command to locate it:$ which bsub
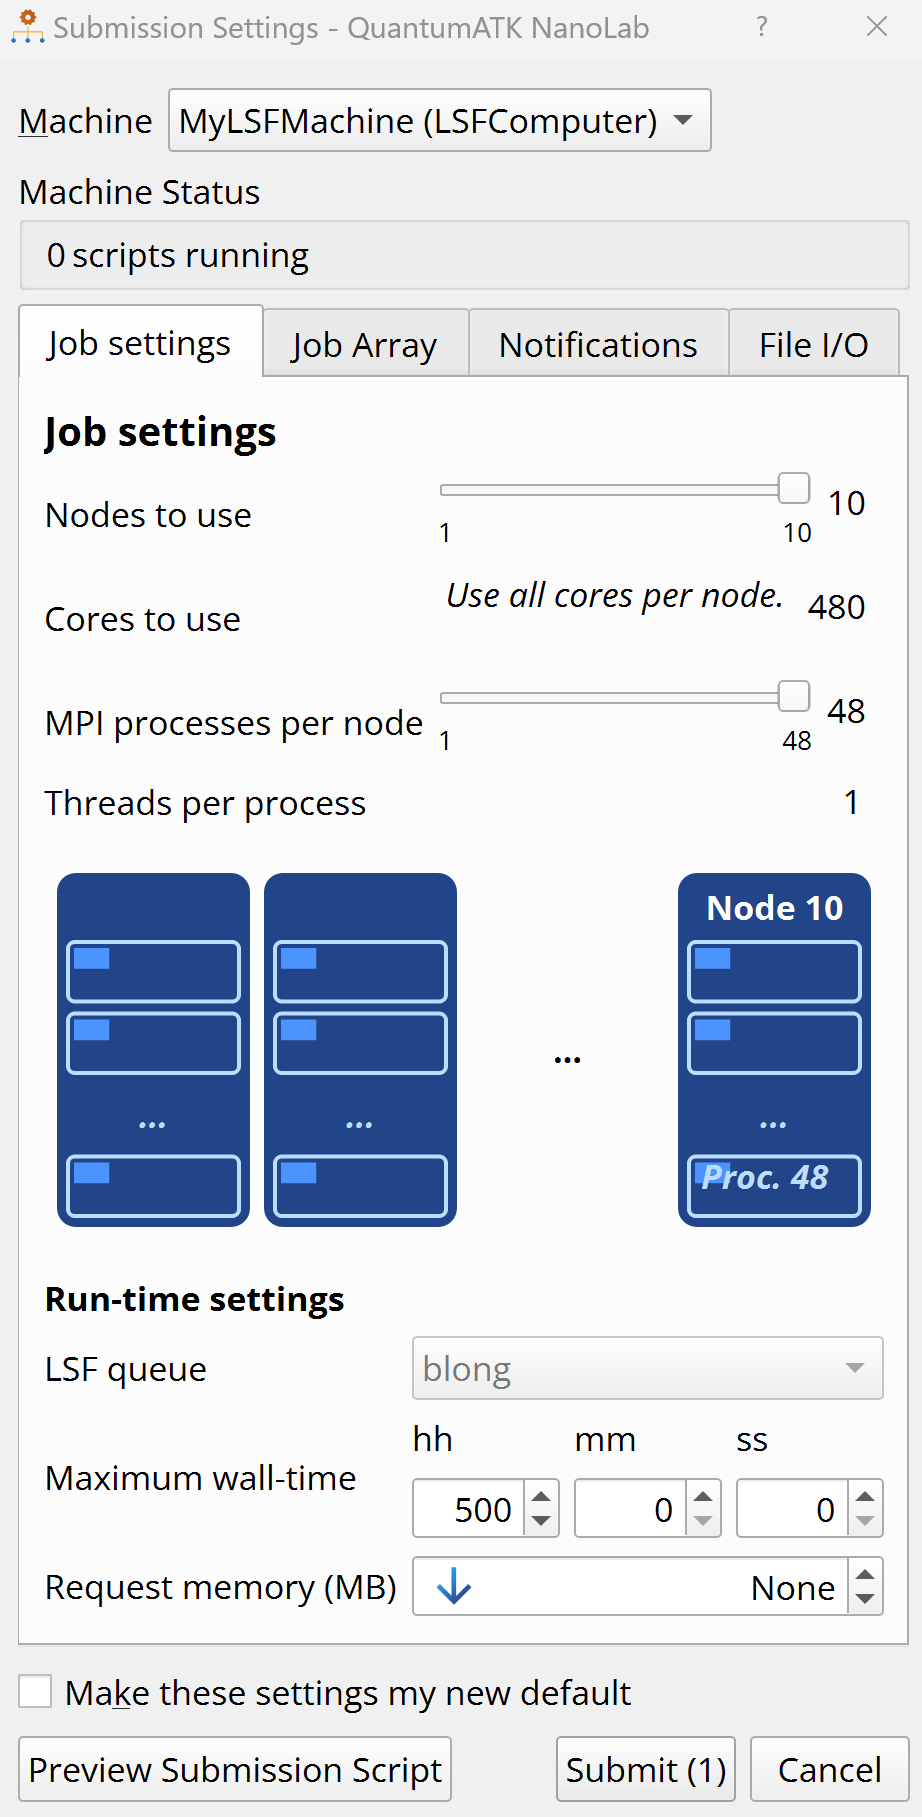
Job Settings
Computing resources requested at job submission.
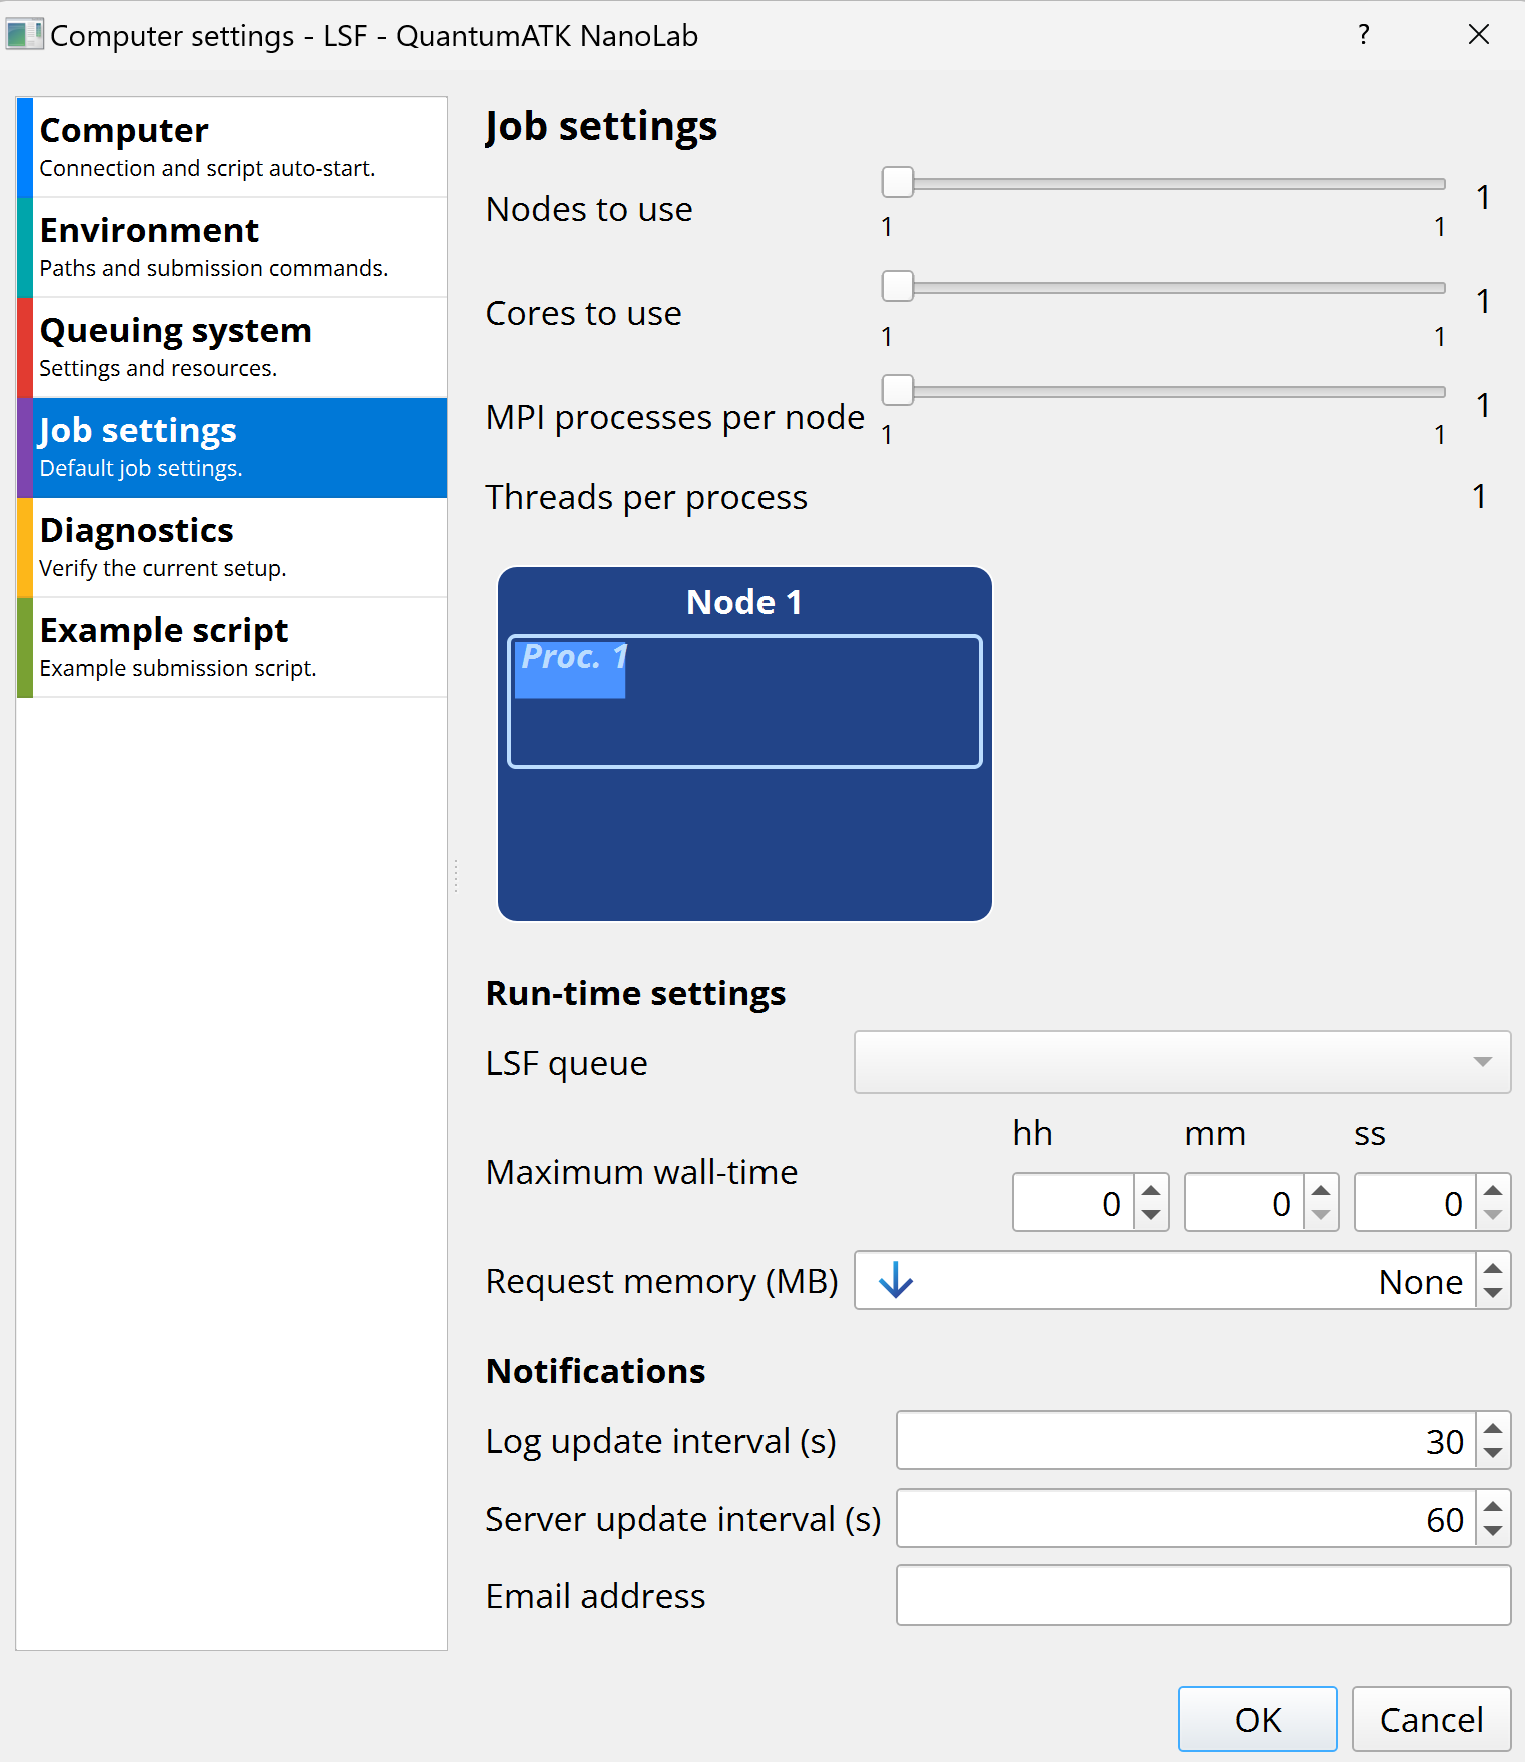
This tab specifies the default computing resources (nodes, cores, queue, time, etc.) requested at job submission. Once the number of cores to use on each node is specified, you can decide how to split them between MPI and threading parallelization. While changing the number of MPI processes, the number of threads per process is automatically adjusted.
The Job Manager will regularly check the job progress on the remote cluster and report it in the log file. You can also receive e-mail notifications from the job scheduler when the job starts, finishes, or terminates. Refer to your cluster administrator to know if email notifications are supported in your cluster.
Diagnostics
Use this tab to test the computer settings. Green check-mark indicates that all settings appear to be OK. Red cross indicates some problem that should be fixed in one of the tabs.
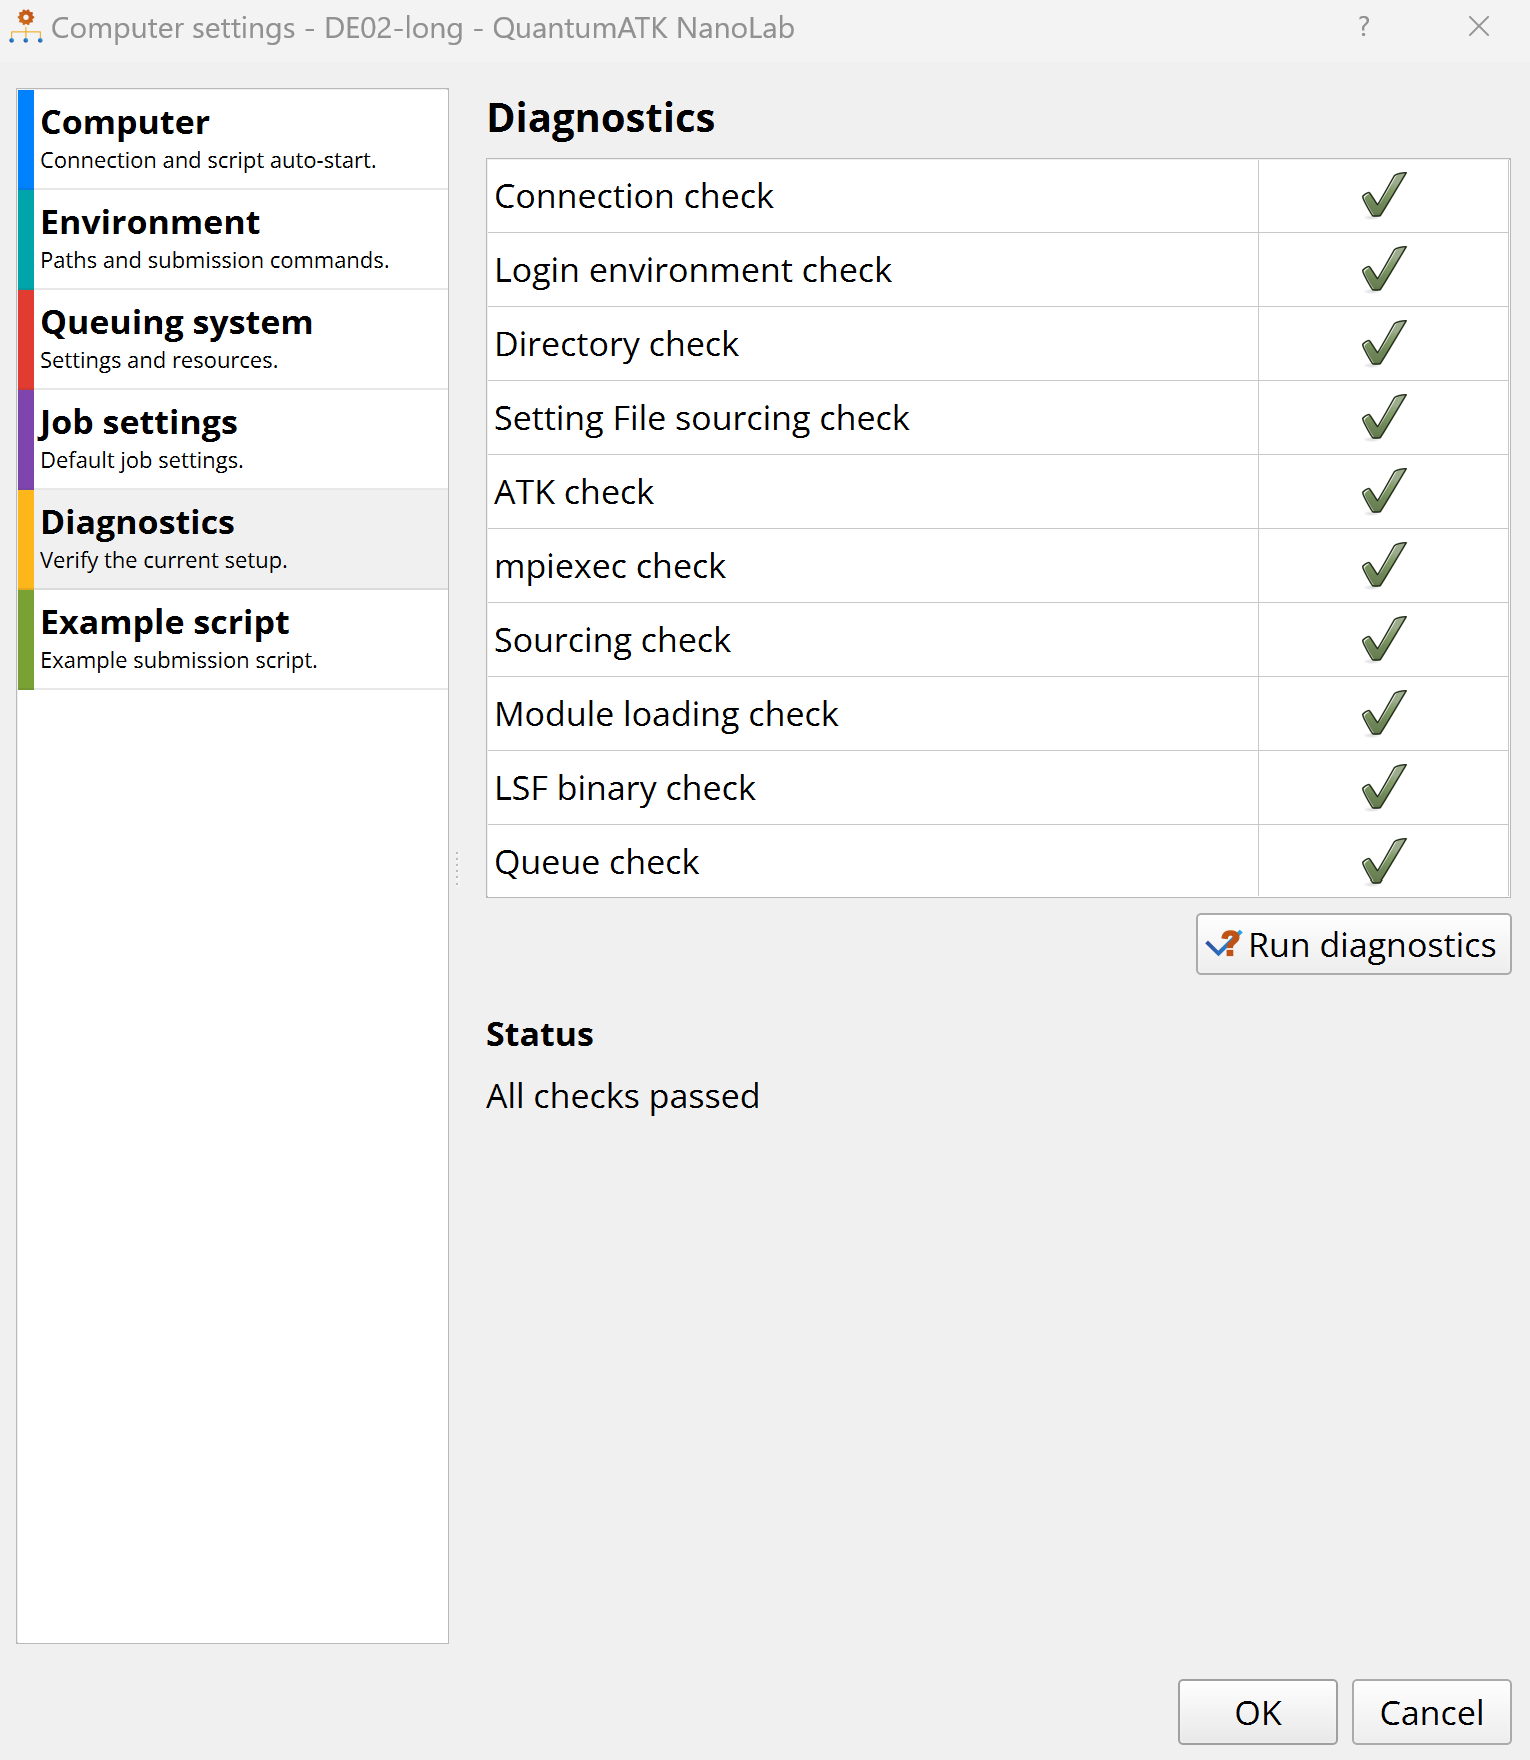
Warning
The Diagnostics tab checks if the options in the Computer and Environment tabs allow your local computer to connect to the remote cluster and execute the commands needed for job submission and management.
If some field is not specified, the diagnostics will check the default setting. If the connection to the cluster works well with that default, or is at least not disrupted, it will be marked as OK.
You therefore need to run an actual test job to make absolutely sure that all settings are indeed OK.
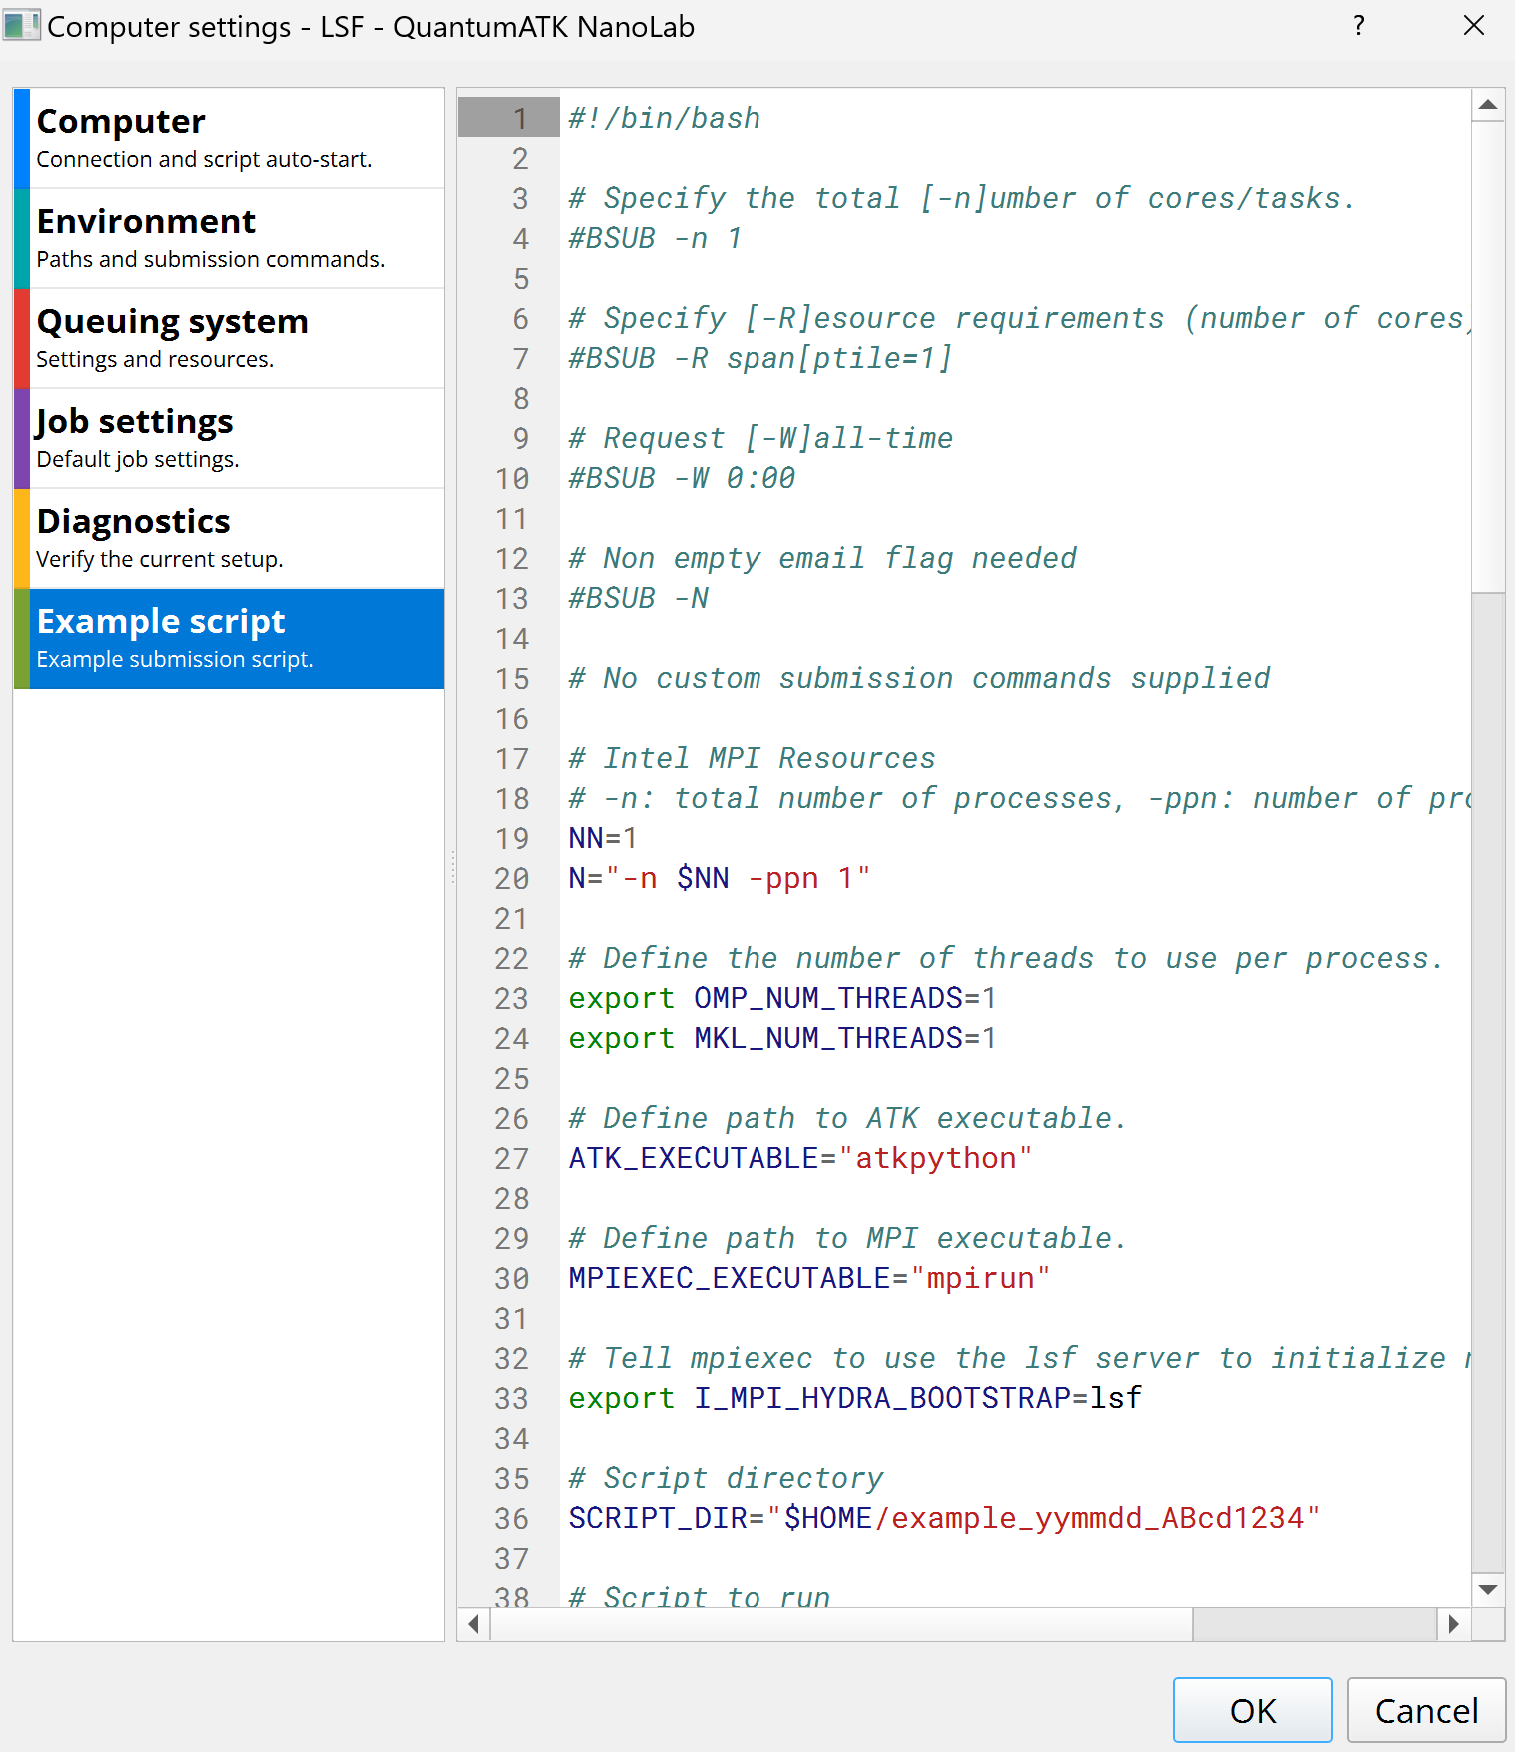
Example script
This shows an example of a job submission script. You can for example check that the options passed to the job scheduler are correct.
Save and test the new machine
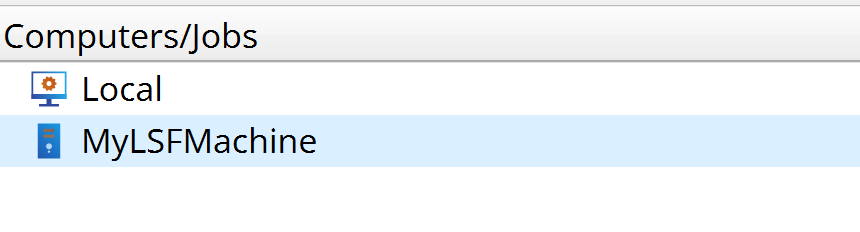
Click OK to add the machine to the Computers/Jobs.
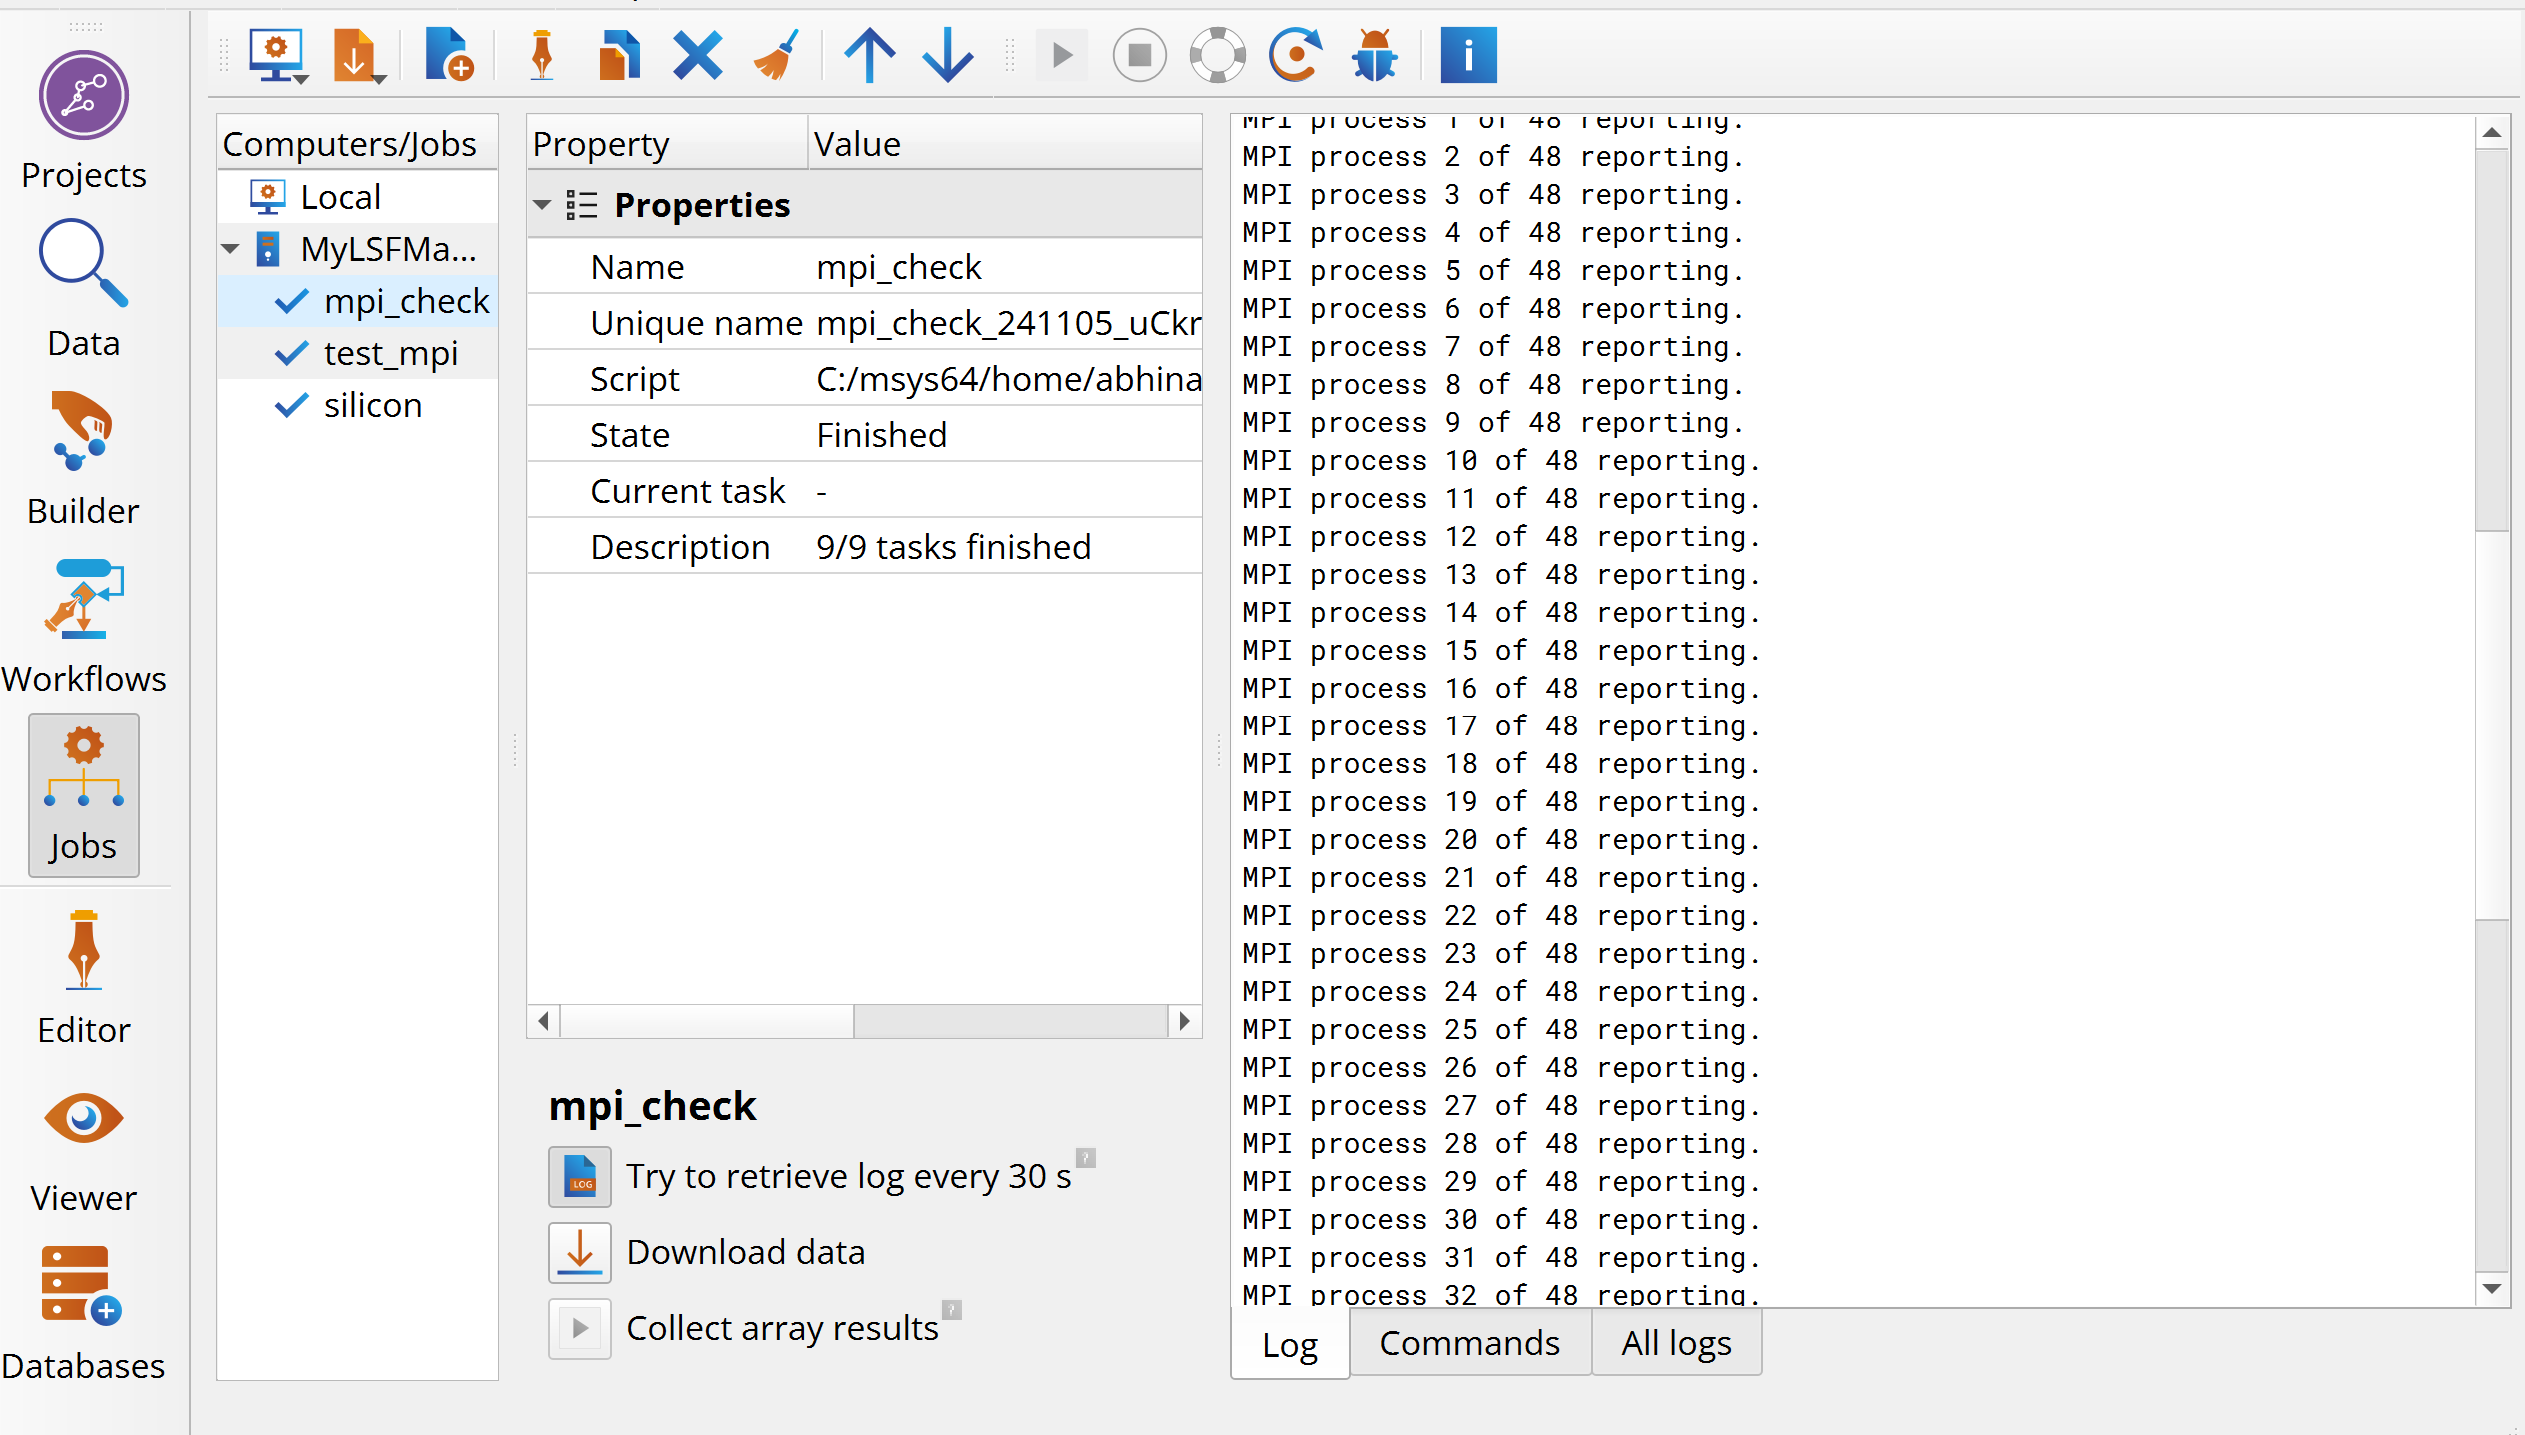
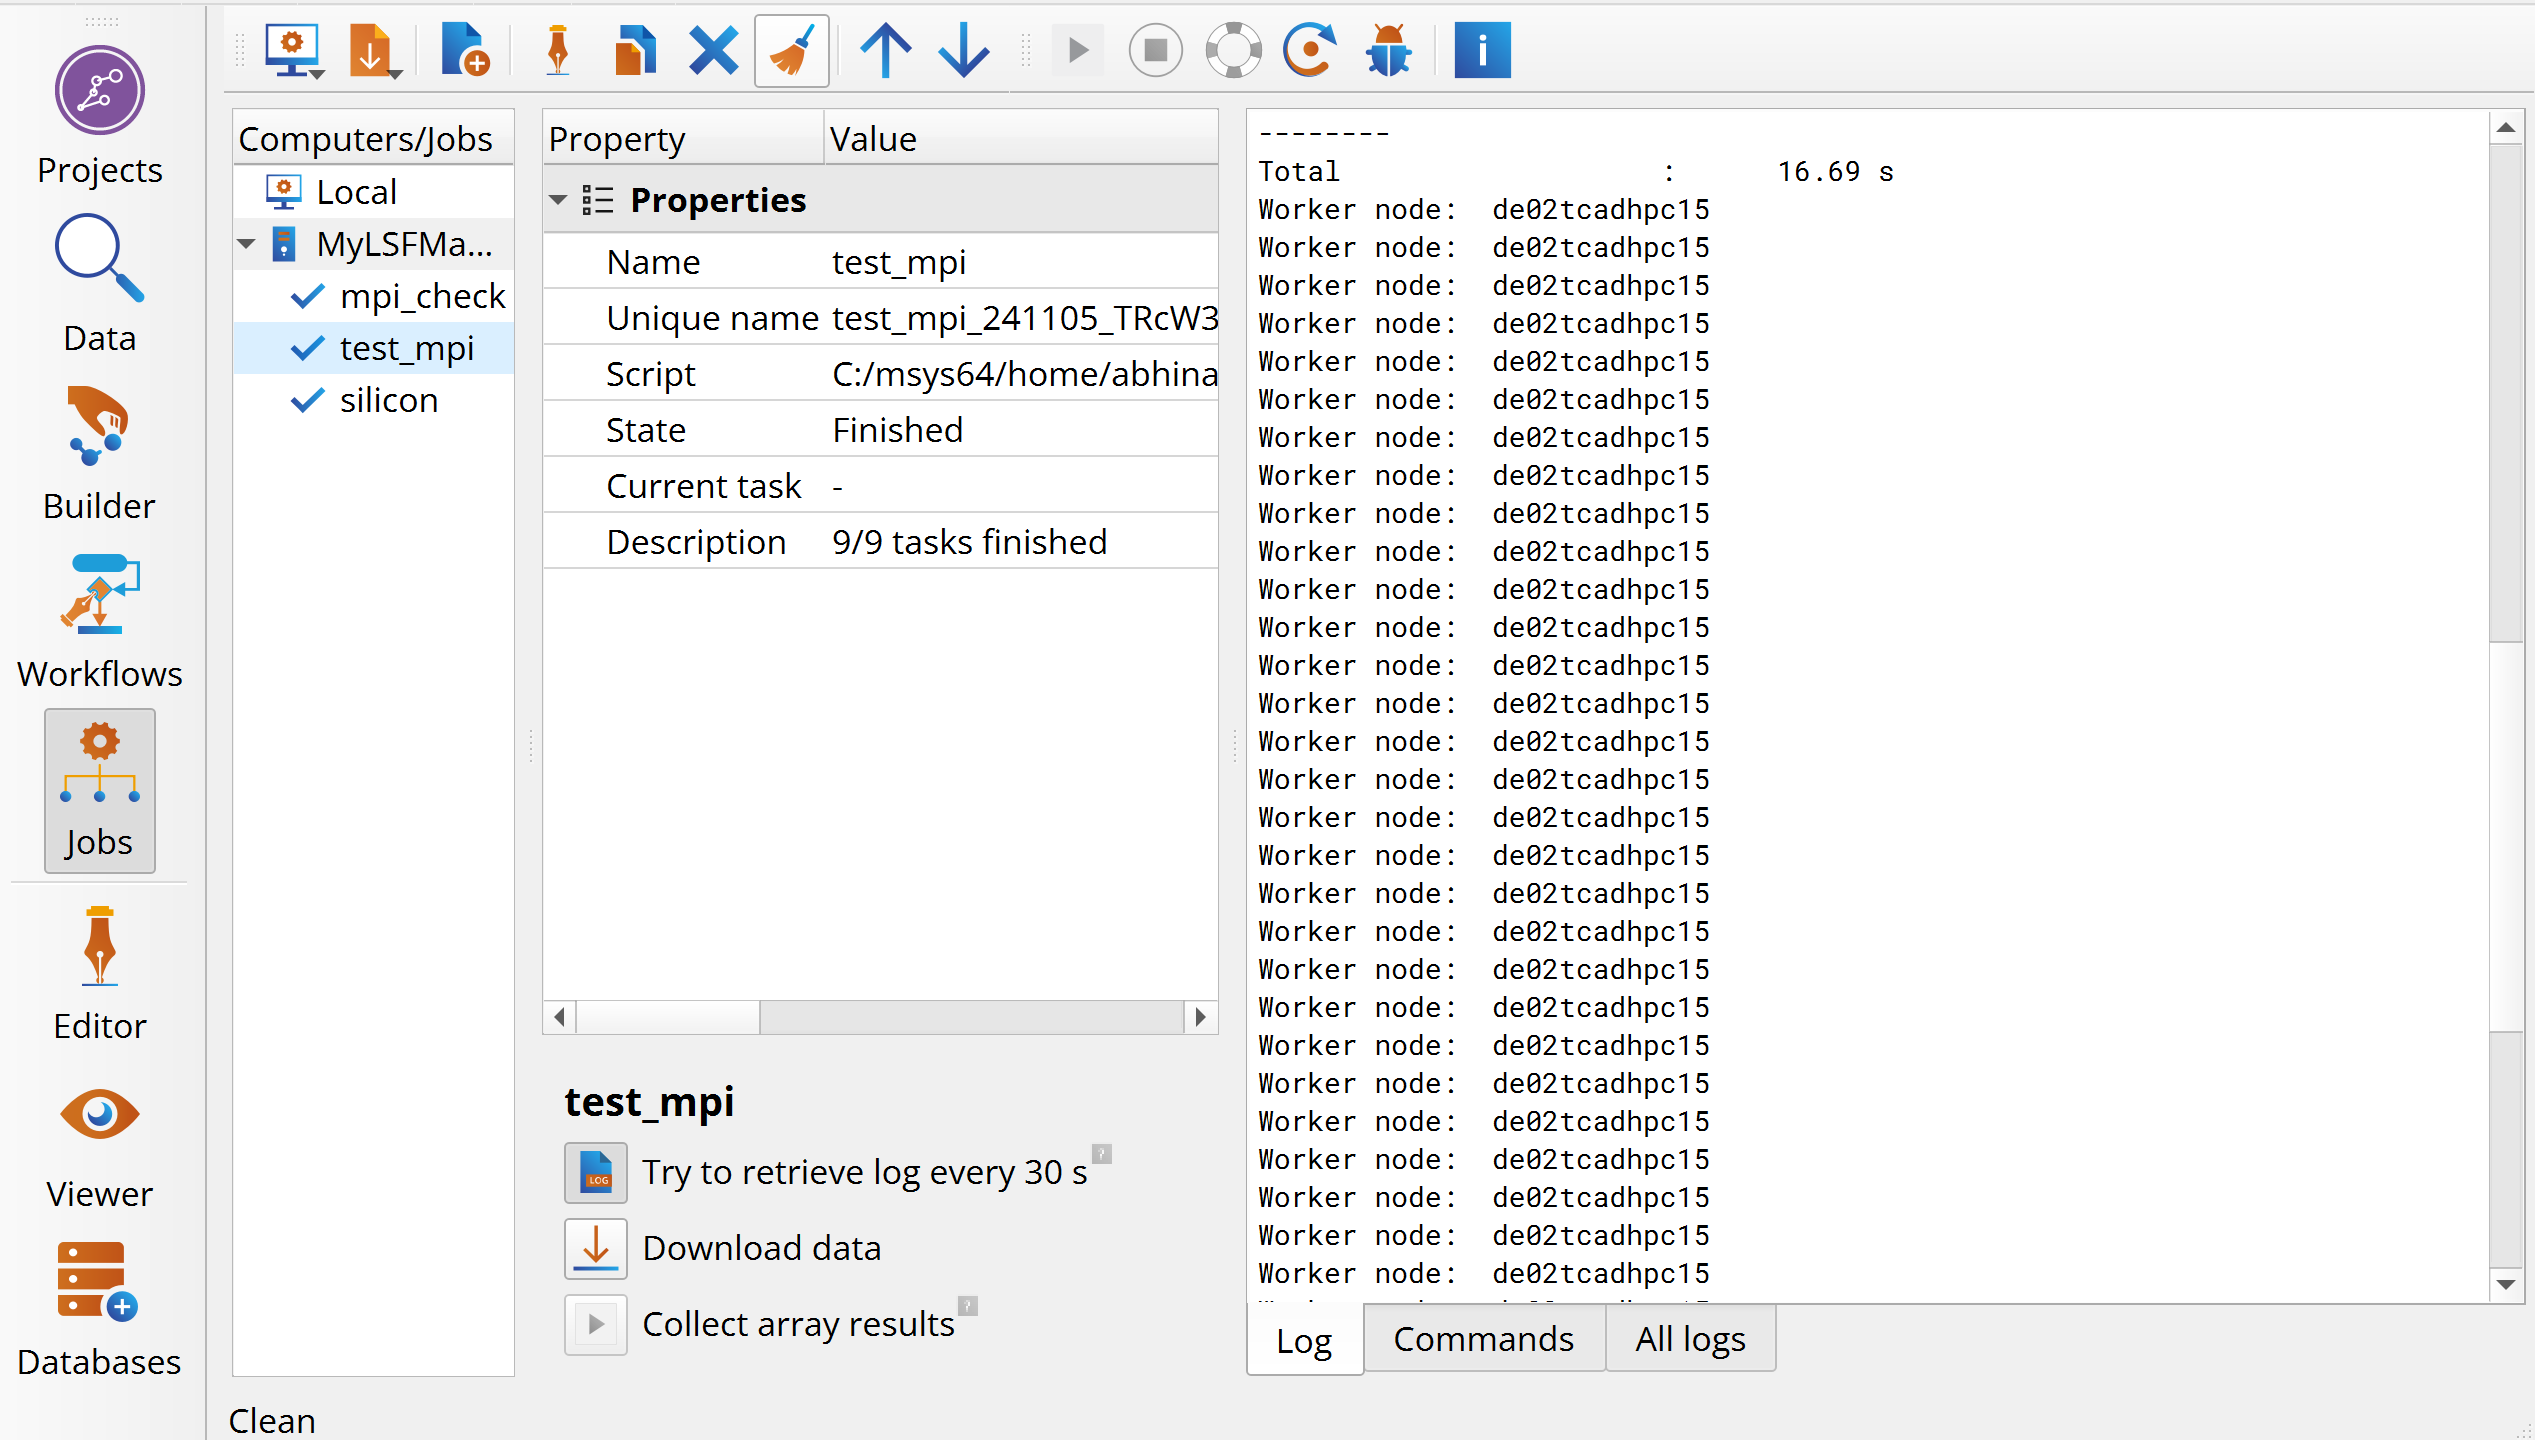
Next, you should run the test scripts mpi_check.py and test_mpi.py to test the
machine settings. In the QuantumATK main window, click on  Add new job, then choose the script from the file dialog box, and click Open.
This will open the Computer Settings dialog box. Choose the remote machine, in this example MyLSFMachine, and click Submit.
Once a job has finished you should check the log file to inspect the job output to see if the expected number of processes were used. Click the Log tab to open the log. In the two examples below, 48 cores were used in total on a single node.
Custom job settings
As explained in the tutorial Job Manager for local execution of QuantumATK scripts, you can customize
many of the job settings before submitting a job. Use the script silicon.py
as an example QuantumATK script. Download the script, and then Open the script
from file dialog box by clicking Add new job. This will open a
Submission Settings dialog box.
You can now customize the Job Defaults, Job Array, Notifications and File I/O tabs, and thereby submit the job with settings different from the default ones you specified above. For example, you can change the number of requested cores and cluster queue and/or maximum wall-clock time.
Set up the job settings as you like, e.g. 4 cores on a single node and 4 MPI processes. Then click OK and submit the calculation to the remote cluster.
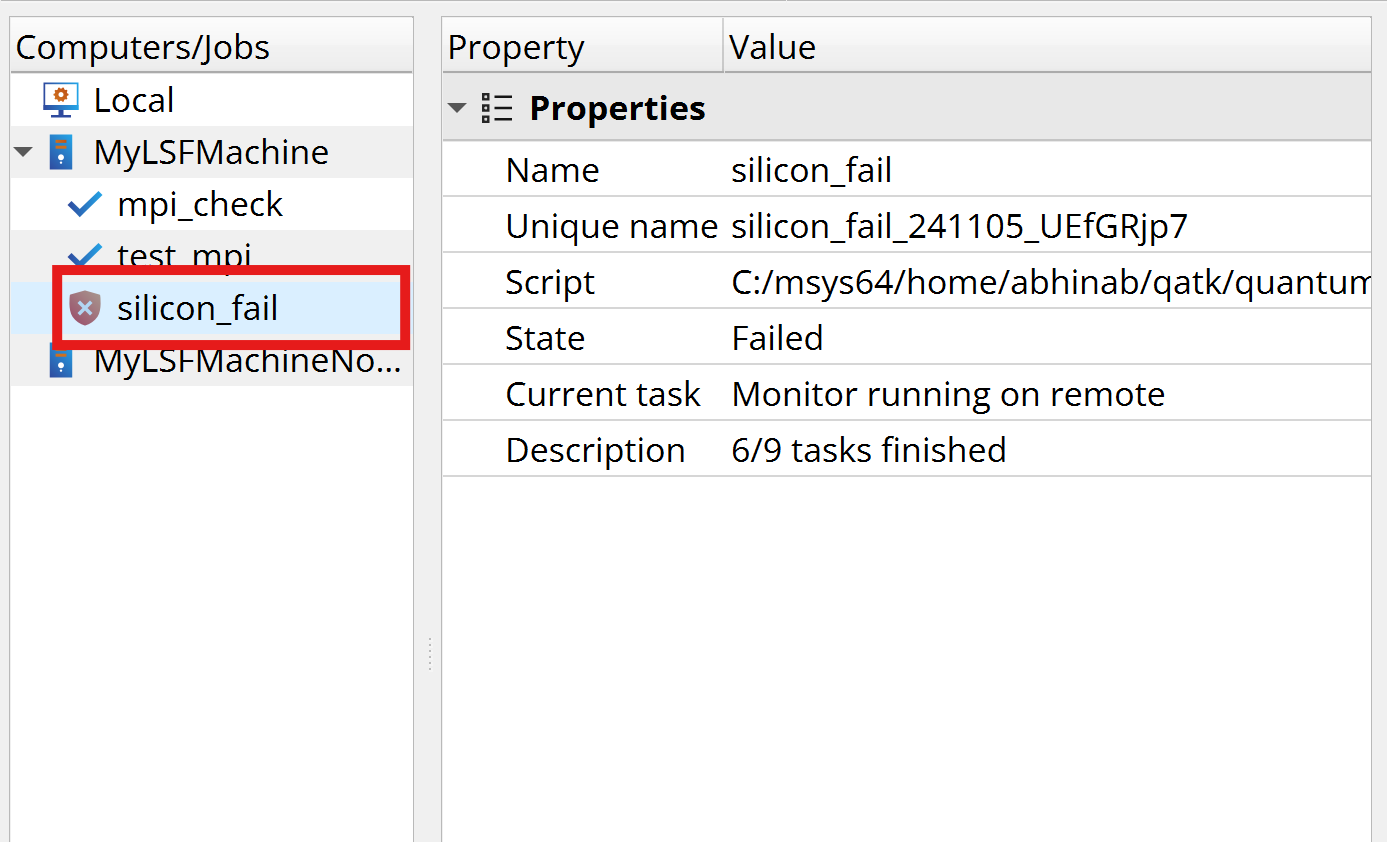
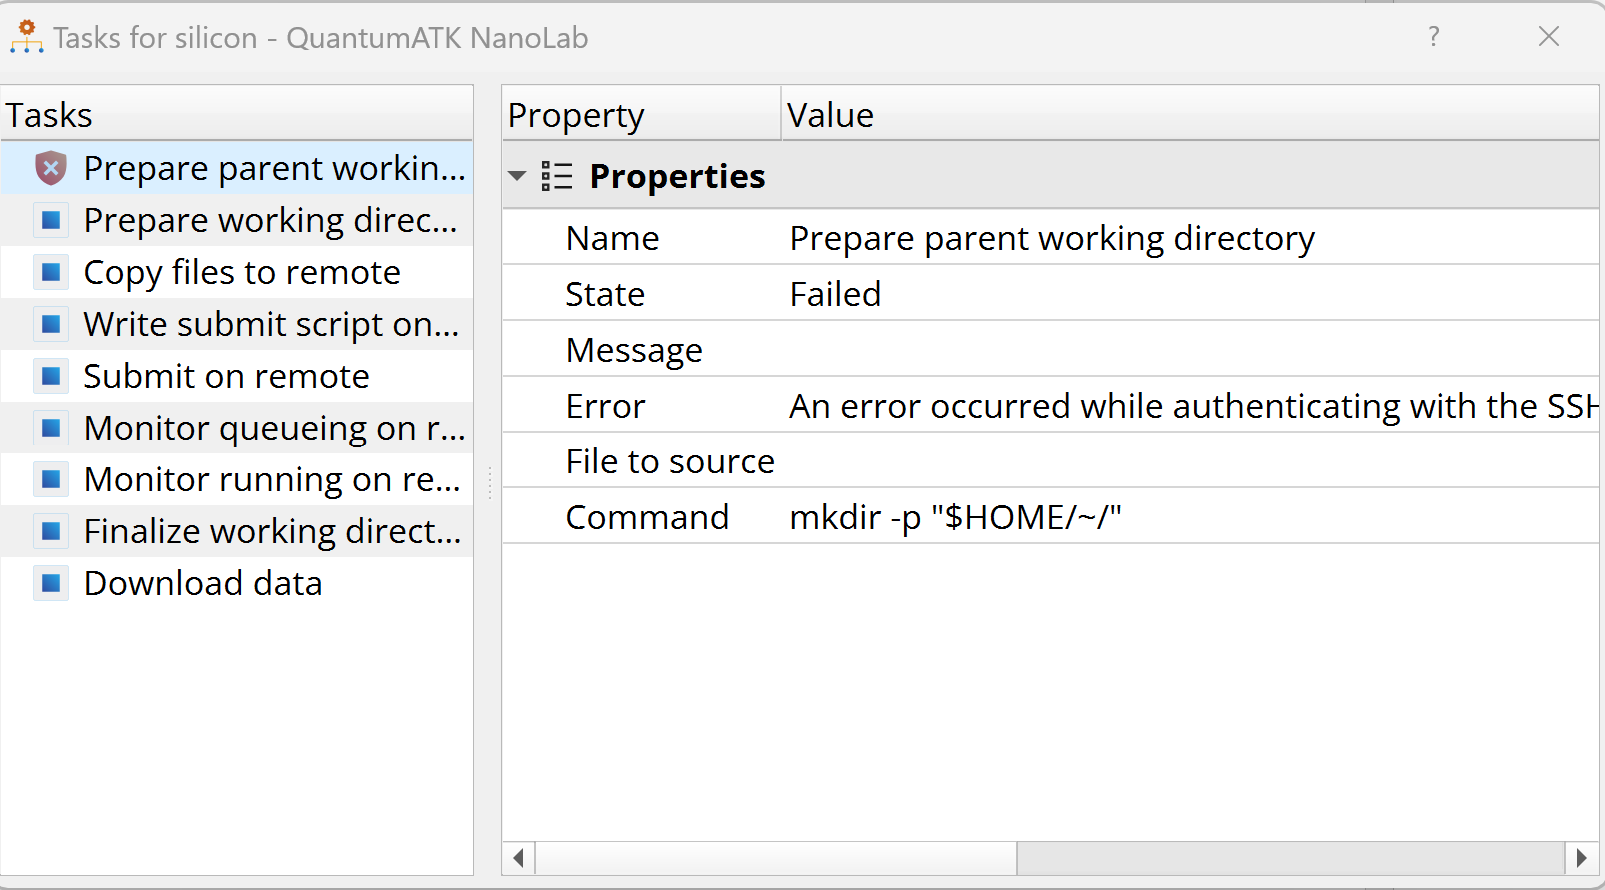
Debugging
If an error occurs during the execution of the job, this will be indicated
by a red icon in the queue, as shown below. You can then click the
 Debug logs icon to open the job debugs
information window, which will show you details about the error.
Debug logs icon to open the job debugs
information window, which will show you details about the error.
Adding several remote machines
Several remote machines can be added to the Computers/Jobs. You can of course add new machines from scratch, but you can also export/import the settings of an existing machine and use those as a template for new machines.
Tip
The import/export functionality is very convenient for sharing machine settings within a group of users.
In the following, you will export the settings of the newly created machine, and then add one more remote machine with different queue and job settings.
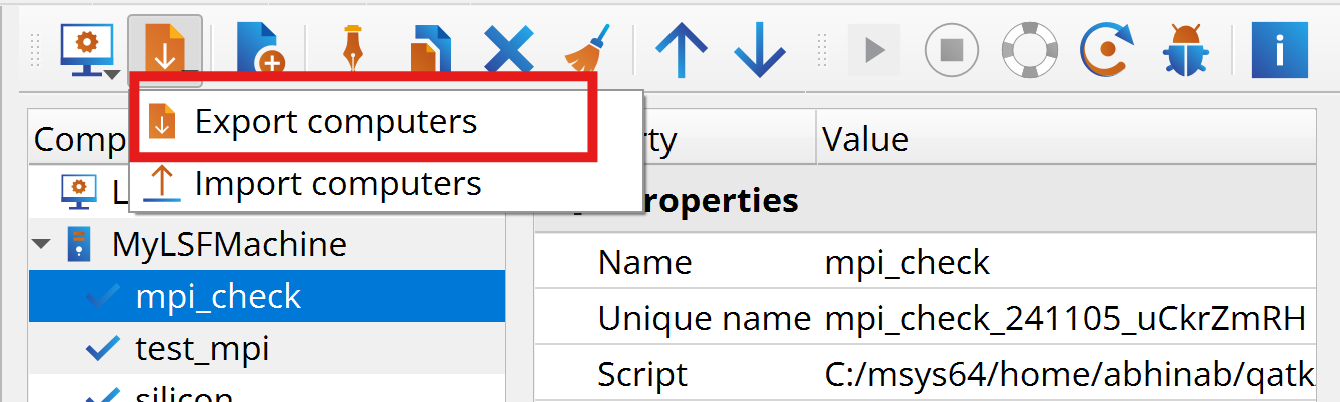
Export
Select the machine and click on  Import or export computers , then click Export,
and save the settings in a file.
Import or export computers , then click Export,
and save the settings in a file.
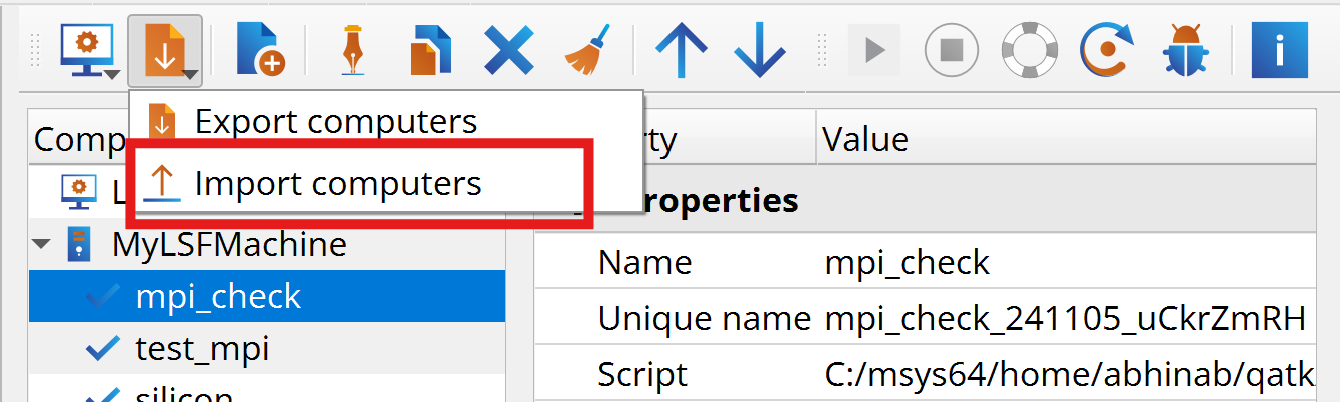
Import
Next, add a new remote machine with default settings for “New LSF”.
click on Import or export computers , then click
 Import and import the settings file you just saved.
You can now modify the settings to create a machine with default settings that are suitable for :
Select the new machine and click Edit. This will open the Computer Settings dialog box. Give the new machine a reasonable name, e.g. “MyNewLSFMachine” and set the password, if Password is selected for authentication. Then, change the job submission queue to “mynewqueue” by adding BSUB -app myqueue in Custom submission commands of the Environment tab. Additionally , you can change the Nodes available, e.g. to 2, and Cores per node, e.g. to 8, in the Queuing system tab. Finally, Run diagnostics in the Diagnostics tab to check if the settings are correct and click OK, if it passes all the checks.