Capping a carbon nanotube
In this tutorial you will learn how to create a capped nanotube. Specifically you will:
Create a nanotube.
Cut a C60 fullerene in half - this will be the cap.
Attach the cap to the nanotube.
Clean up a bit.
In this tutorial we will build a (5,5) nanotube capped by a C60 hemisphere. There are, however, multiple other combinations of nanotubes and fullerenes that match, but such capped tubes can also be constructed using the approach presented here.
Please see also the video tutorial below. Many more are available on the QuantumATK YouTube channel.
Build an extended (5,5) carbon nanotube
Open QuantumATK and create a new project by clicking Create New. Give the project a Title (here: “Carbon_nanotube”), select the folder where data will be stored, then click OK and Open to start the project.

In the QuantumATK main window, click on the
 icon to open the Builder.
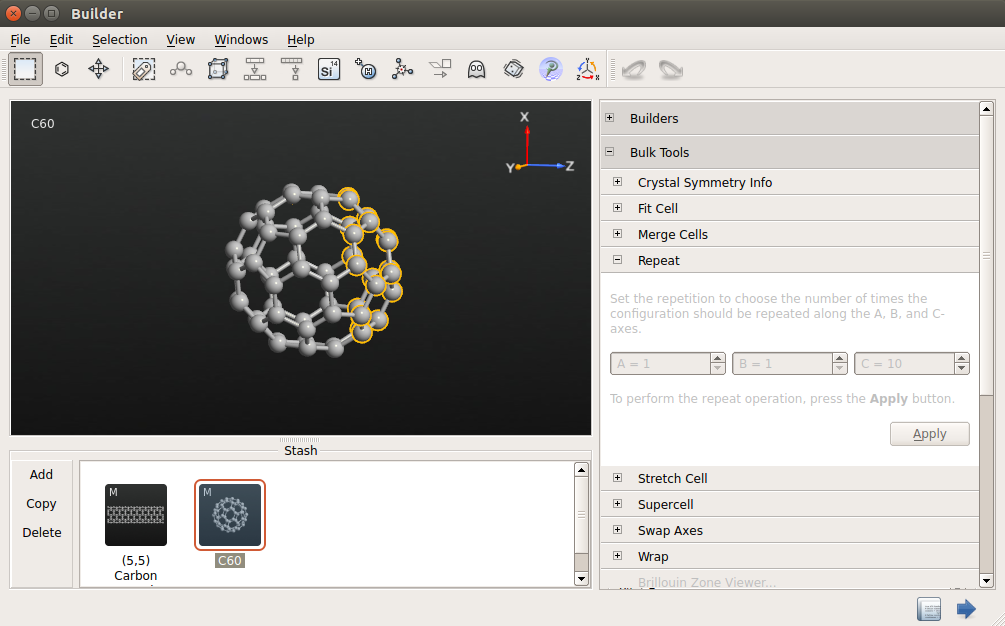
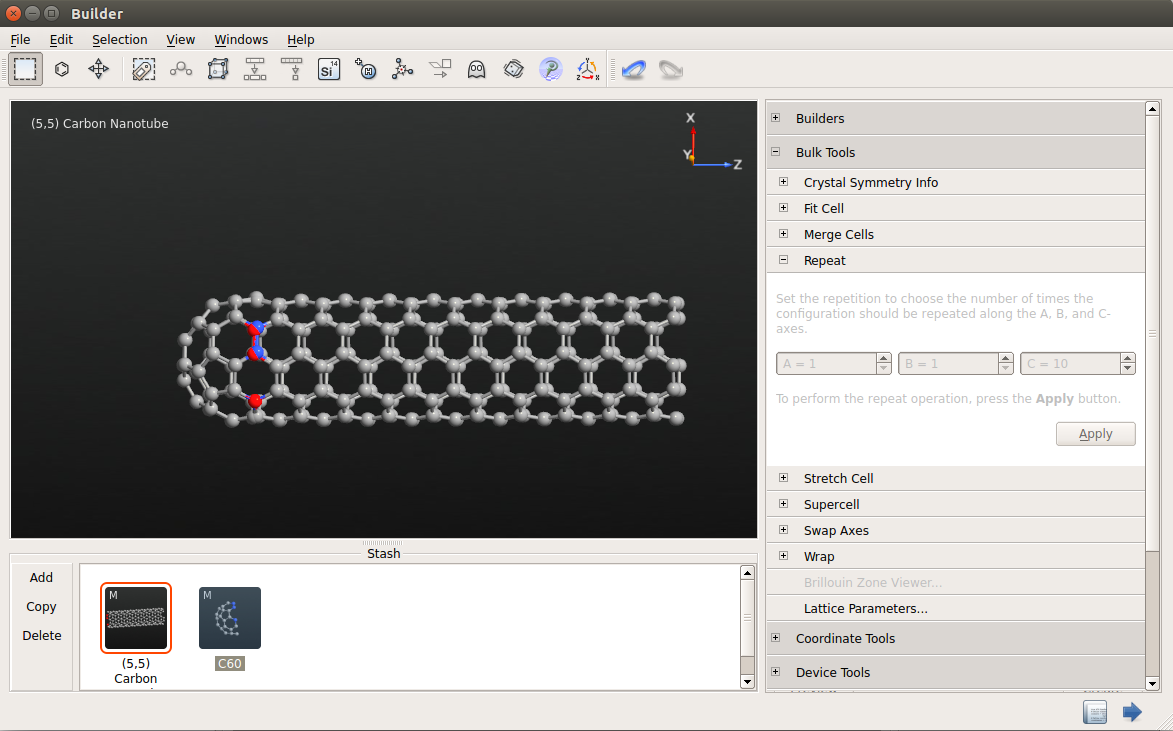
Go to the Stash, click , and the Nanotube Builder window will come up. Here, set the parameters as shown in the figure bellow (M = N= 5), and press “Build”.


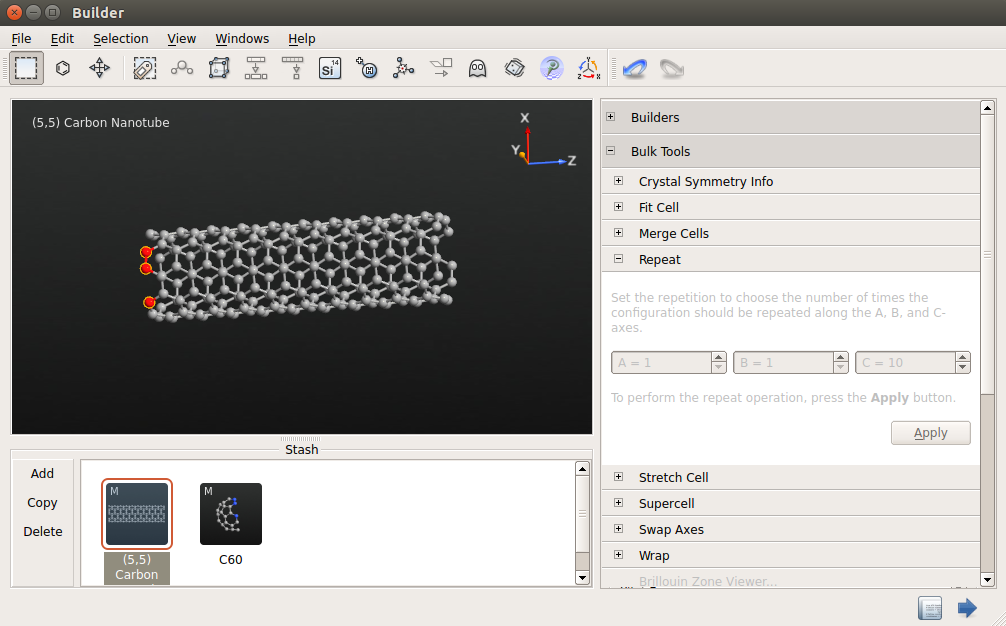
In the Builder, go to to extend the structure 10 times in the C-direction, as shown in the figure that follows, and Press “Apply” and after
Crtl+Rto see the whole structure properly.
Remove the unit cell by clicking the
 button.
The capped tube is anyway not periodic, so we build it as a molecule.
button.
The capped tube is anyway not periodic, so we build it as a molecule.
Cut the fullerene in half
In order to insert the C60 molecule in the Stash click on , and choose from the menu. Locate C60 in the list. Press the
 icon, or double-click
its line in the list, to send it to the Stash.
icon, or double-click
its line in the list, to send it to the Stash.In the C60-CNT (5,5) system the tip of the cap is a pentagon. Imagine now a coordinate system in the screen plane where east is right, north up, south down, and west left. Then rotate the fullerene so that the western face of the system is a pentagon, while keeping the Z axis pointing to the “east” and the X axis roughly to the “north”.
The cap is made from 30 carbon atoms, corresponding to half the C60. If, however, you cut the molecule in half, it becomes very difficult to attach it to the nanotube. The trick is instead to leave one extra “layer” of atoms, which match almost perfectly the edge of the nanotube. Therefore, select the atoms as shown in the picture above, and delete them.

The edge of the cap consists of pairs of atoms - just like the edge of the tube. Thus, select 3 atoms as shown in the picture below - two in a pair and one more in the neighboring pair - and change them to nitrogen using the
 button. This is just to
make it easier to identify them in the next step.
button. This is just to
make it easier to identify them in the next step.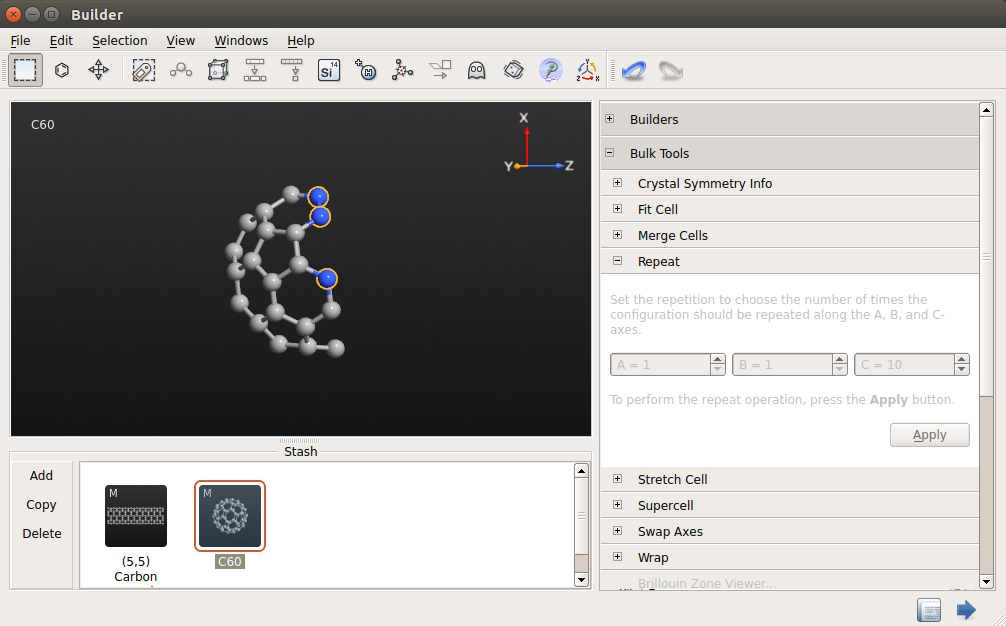
Capping the tube
In the Stash, double-click on the “(5,5) Carbon Nanotube” object.
Select three equivalent atoms in the tube, as you did in the cap. By equivalent it means that the edge of the tube looks just like the edge of the cap, with pairs of atoms, and the goal is to match up these pairs. Change these three atoms to oxygen, again to make them easy to identify.
Drag and drop the C60 object from the Stash to the 3D window to import the cap. The next few steps may differ slightly in precise detail from the images, depending on which precise atoms you changed to nitrogen.
When the cap was imported, the
 Move tool was
automatically activated. Select one of the nitrogen atoms (as shown
in the picture, the first atom in the pair which is not next to the
lone nitrogen atom) - its selection marker turns red and the atom
is labeled “0”. Then drag it so that it ends up on top of the
equivalent oxygen atom in the tube.
Move tool was
automatically activated. Select one of the nitrogen atoms (as shown
in the picture, the first atom in the pair which is not next to the
lone nitrogen atom) - its selection marker turns red and the atom
is labeled “0”. Then drag it so that it ends up on top of the
equivalent oxygen atom in the tube.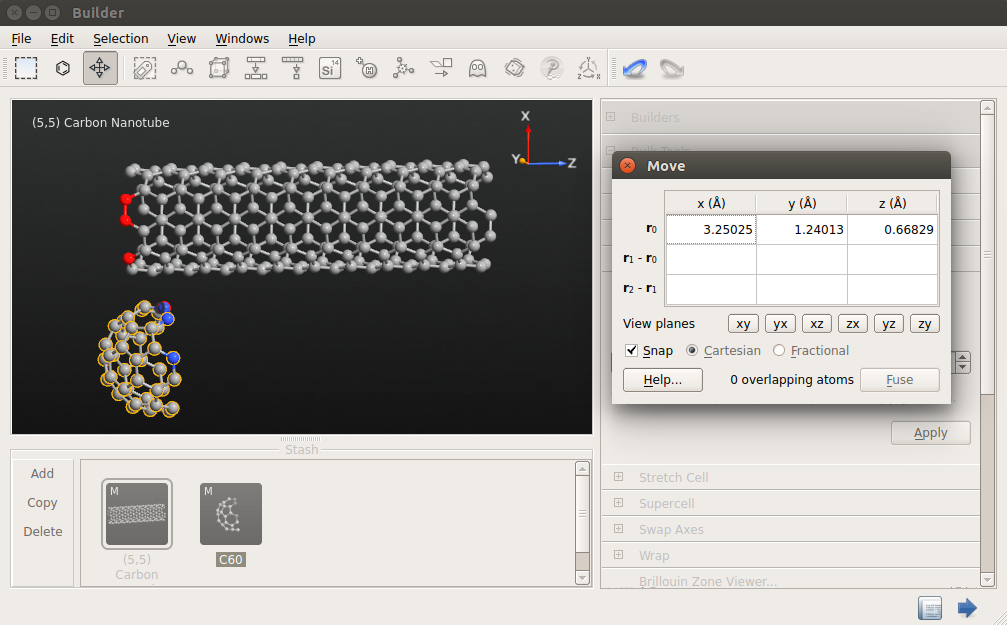
Then select the second nitrogen atom in the pair. When you now drag this atom (red selection marker, and labeled “1”), the cap will not move, it will rotate around the bond between atoms “0” and “1”. Rotate the cap in place by making atom “1” overlap the next oxygen atom in the pair on the tube edge. You may need to rotate the view to get a clear aim.
Finally, select the third nitrogen atom, and move it on top of the third oxygen atom (dihedral rotation). The final structure is shown below.
In case you did not succeed (sometimes the cap becomes inverted), undo the last two steps, unselect all anchor atoms by clicking the background, select only one atom and move the cap out a bit from the tube, and try again from 4. It can also be a good idea to pre-align the cap with the tube - see the video above for details!
Finalizing the geometry
At this point there are overlapping atoms - in fact we utilized this to construct the geometry. You could use “Fuse” in the Move tool, but there are atoms which are only almost overlapping, which are not detected.
Instead, close the Move tool, and open , enter a distance of 0.7 Å and press “Select” (10 atoms should be selected) and then click
Delete.Change all atoms back to carbon.
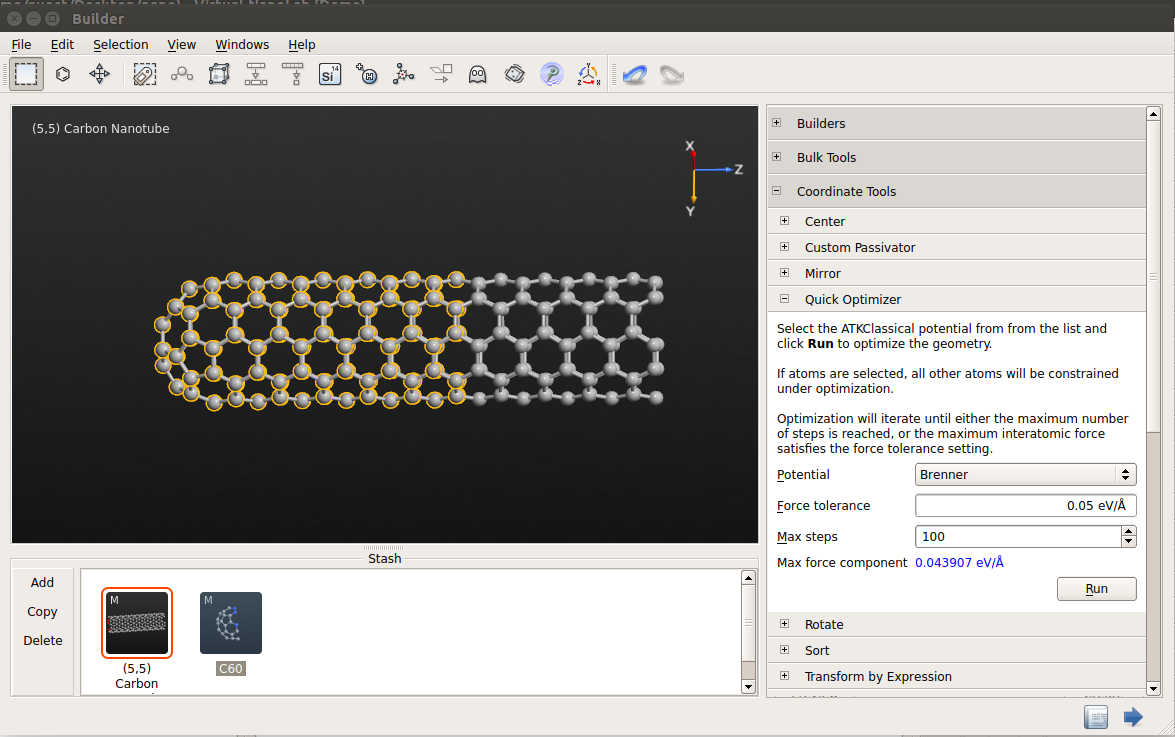
You need to optimize the cap, since the radius of the fullerene is slightly different from the naontube. You will however at the same time want to keep the other end of the nanotube as it is (perfectly periodic) so that we can later extend it, if necessary. Therefore, first select the cap and a few more layers of atoms in nanotube (about half of the tube should be fine). Then, open , set the maximum number of iterations to 100, and click “Run”. The tool uses the ATKClassical potentials, so the optimization only takes a few seconds.
Connection to other structures
Building this structure just by itself is not very meaningful - you will want to connect it to something, like a surface or molecule. This will be covered by other tutorials, where you will learn how to build structures like those in the pictures below.


Below is selection of other capped nanotubes that can be built with a very similar approach. These system are slightly more difficult to build, and require some hand tuning.

