Building molecule–surface systems: Benzene on Au(111)
Version: 2017.0
In this tutorial you will learn how to use QuantumATK (QuantumATK) to construct two different adsorption configurations of a benzene molecule adsorbed on the gold (111) surface, here denoted Bz@Au(111). In particular, you will:
Create the structure of bulk Au using the value of the lattice constant reported by Lui et al. in Ref. [1];
Construct a slab model for the Au(111) surface according to the parameters reported in [1];
Attach a benzene molecule to the Au(111) surface slab model;
Modify the atomic coordinates of the Bz molecule to construct configurations of Bz@Au(111) using the advanced building tools in the QuantumATK Builder.
Tip
Once you have constructed these geometries, you can optimize them using one of the computational methods implemented in QuantumATK, and perform further analysis.
Note
Many of the QuantumATK functions described in this tutorial are rather general, and can be used to build complex geometries other than molecules on surfaces, see for example the tutorial on Building a molecular junction.

Summary of workflow
The following is a summary of the main steps needed for building the Bz@Au(111) configurations. These steps are also shown in the short video available below. If needed, more detailed instructions are given in the sections after the video.
Create a new QuantumATK project and open the
 Builder.
Use the Builder Database to import the bulk gold primitive unit cell.
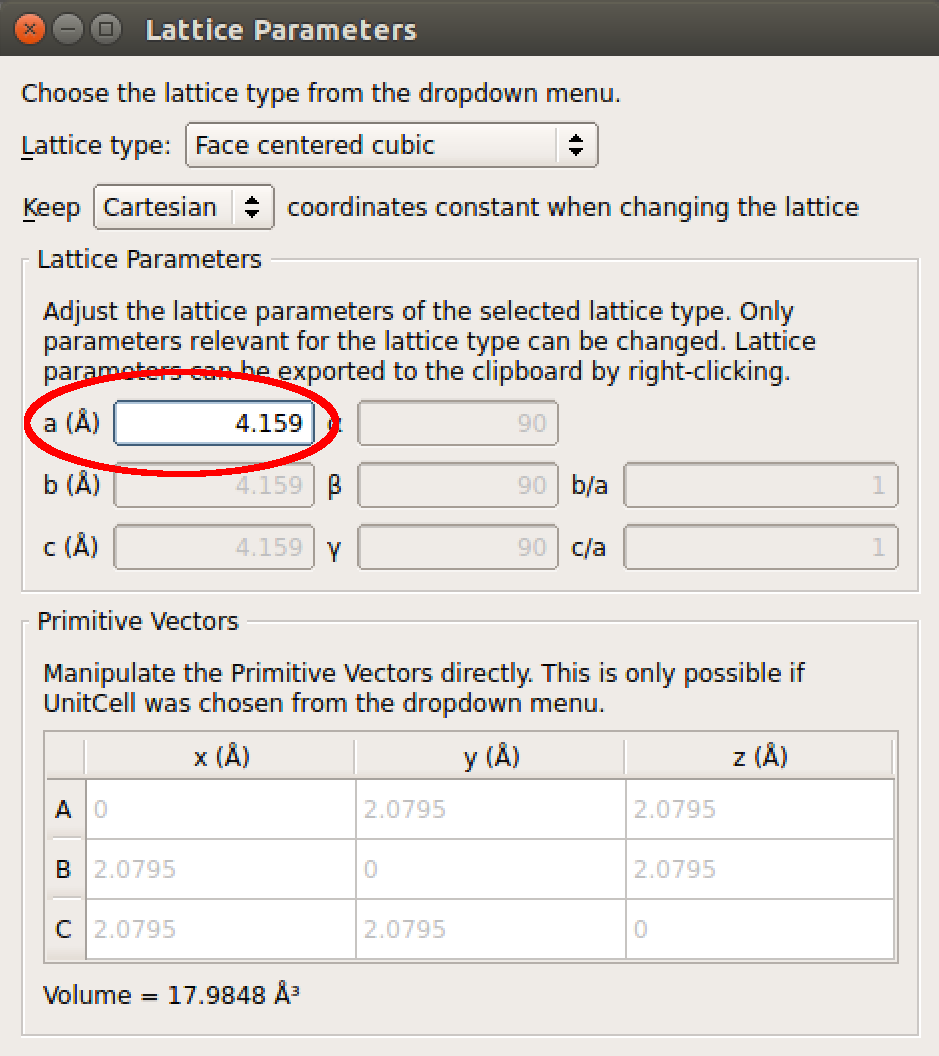
Use the Lattice Parameters plugin to change the gold lattice parameter to \(a=\) 4.159 Å, as reported in Ref. [1] using DFT and the PBE density functional.
Open the Surface (Cleave) plugin, and create the 3\(\times\)3 Au(111) slab with 6 metal layers and 20 Å vacuum above it.
Use the
 Molecular Builder tool to add the benzene
molecule to the slab configuration.
Molecular Builder tool to add the benzene
molecule to the slab configuration.Select the Bz atoms, and use the Rotate plugin to rotate the molecule 90\(^\circ\) around the y-axis such that the molecule can adsorb parallel to the slab surface plane.
Click the
 icon to add a new atom in at the geometrical
center of the molecule.
icon to add a new atom in at the geometrical
center of the molecule.Use the
 Move tool to move the molecule into the hcp-30\(^\circ\) adsorption
site. The extra atom added in the previous step is used to “snap” the molecule
into position, and is afterwards removed from the configuration.
Move tool to move the molecule into the hcp-30\(^\circ\) adsorption
site. The extra atom added in the previous step is used to “snap” the molecule
into position, and is afterwards removed from the configuration.Rename the configuration and create a copy of it in the Stash.
Rename the copy, and use the Rotate plugin to rotate the Bz 30\(^\circ\) around the z-axis to create the hcp-0\(^\circ\) adsorption geometry.
Many more video tutorials are available on the QuantumATK YouTube channel.
Detailed instructions
Building the Au(111) surface
You will here construct a slab model for the Au(111) surface starting from the gold primitive unitcell.
Bulk gold
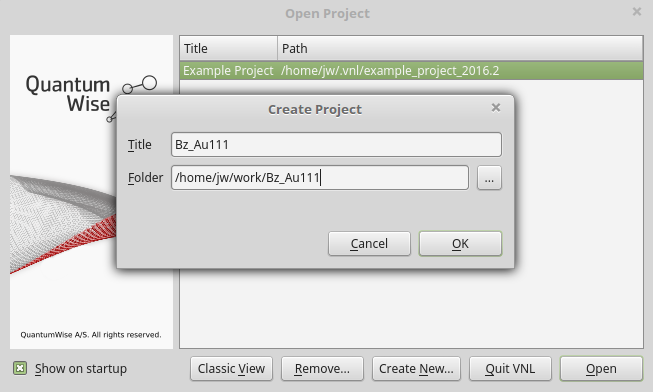
Open QuantumATK and create a new project. Give the project a title (here: “Bz_Au111”), select the folder where the project files should be stored (scripts, data files, etc.), and click OK to create the project.
click Open to open the project and start your QuantumATK session.
In the QuantumATK main window, open the Builder,
and click next to the Stash
to open a database of common materials in their experimental structures.
Search for “gold” using the search bar, and import the structure to the Stash
by clicking the search result and then clicking the  icon:
icon:
The gold primitive cell has been added as a Stash item, and may now be modified using the Builder plugins.
In this case, use the plugin to change the lattice parameter to that reported in Ref. [1] using DFT and the PBE functional, \(a=\) 4.159 Å.

When you are done, close the plugin widget and go back to the Builder.
Au(111) slab
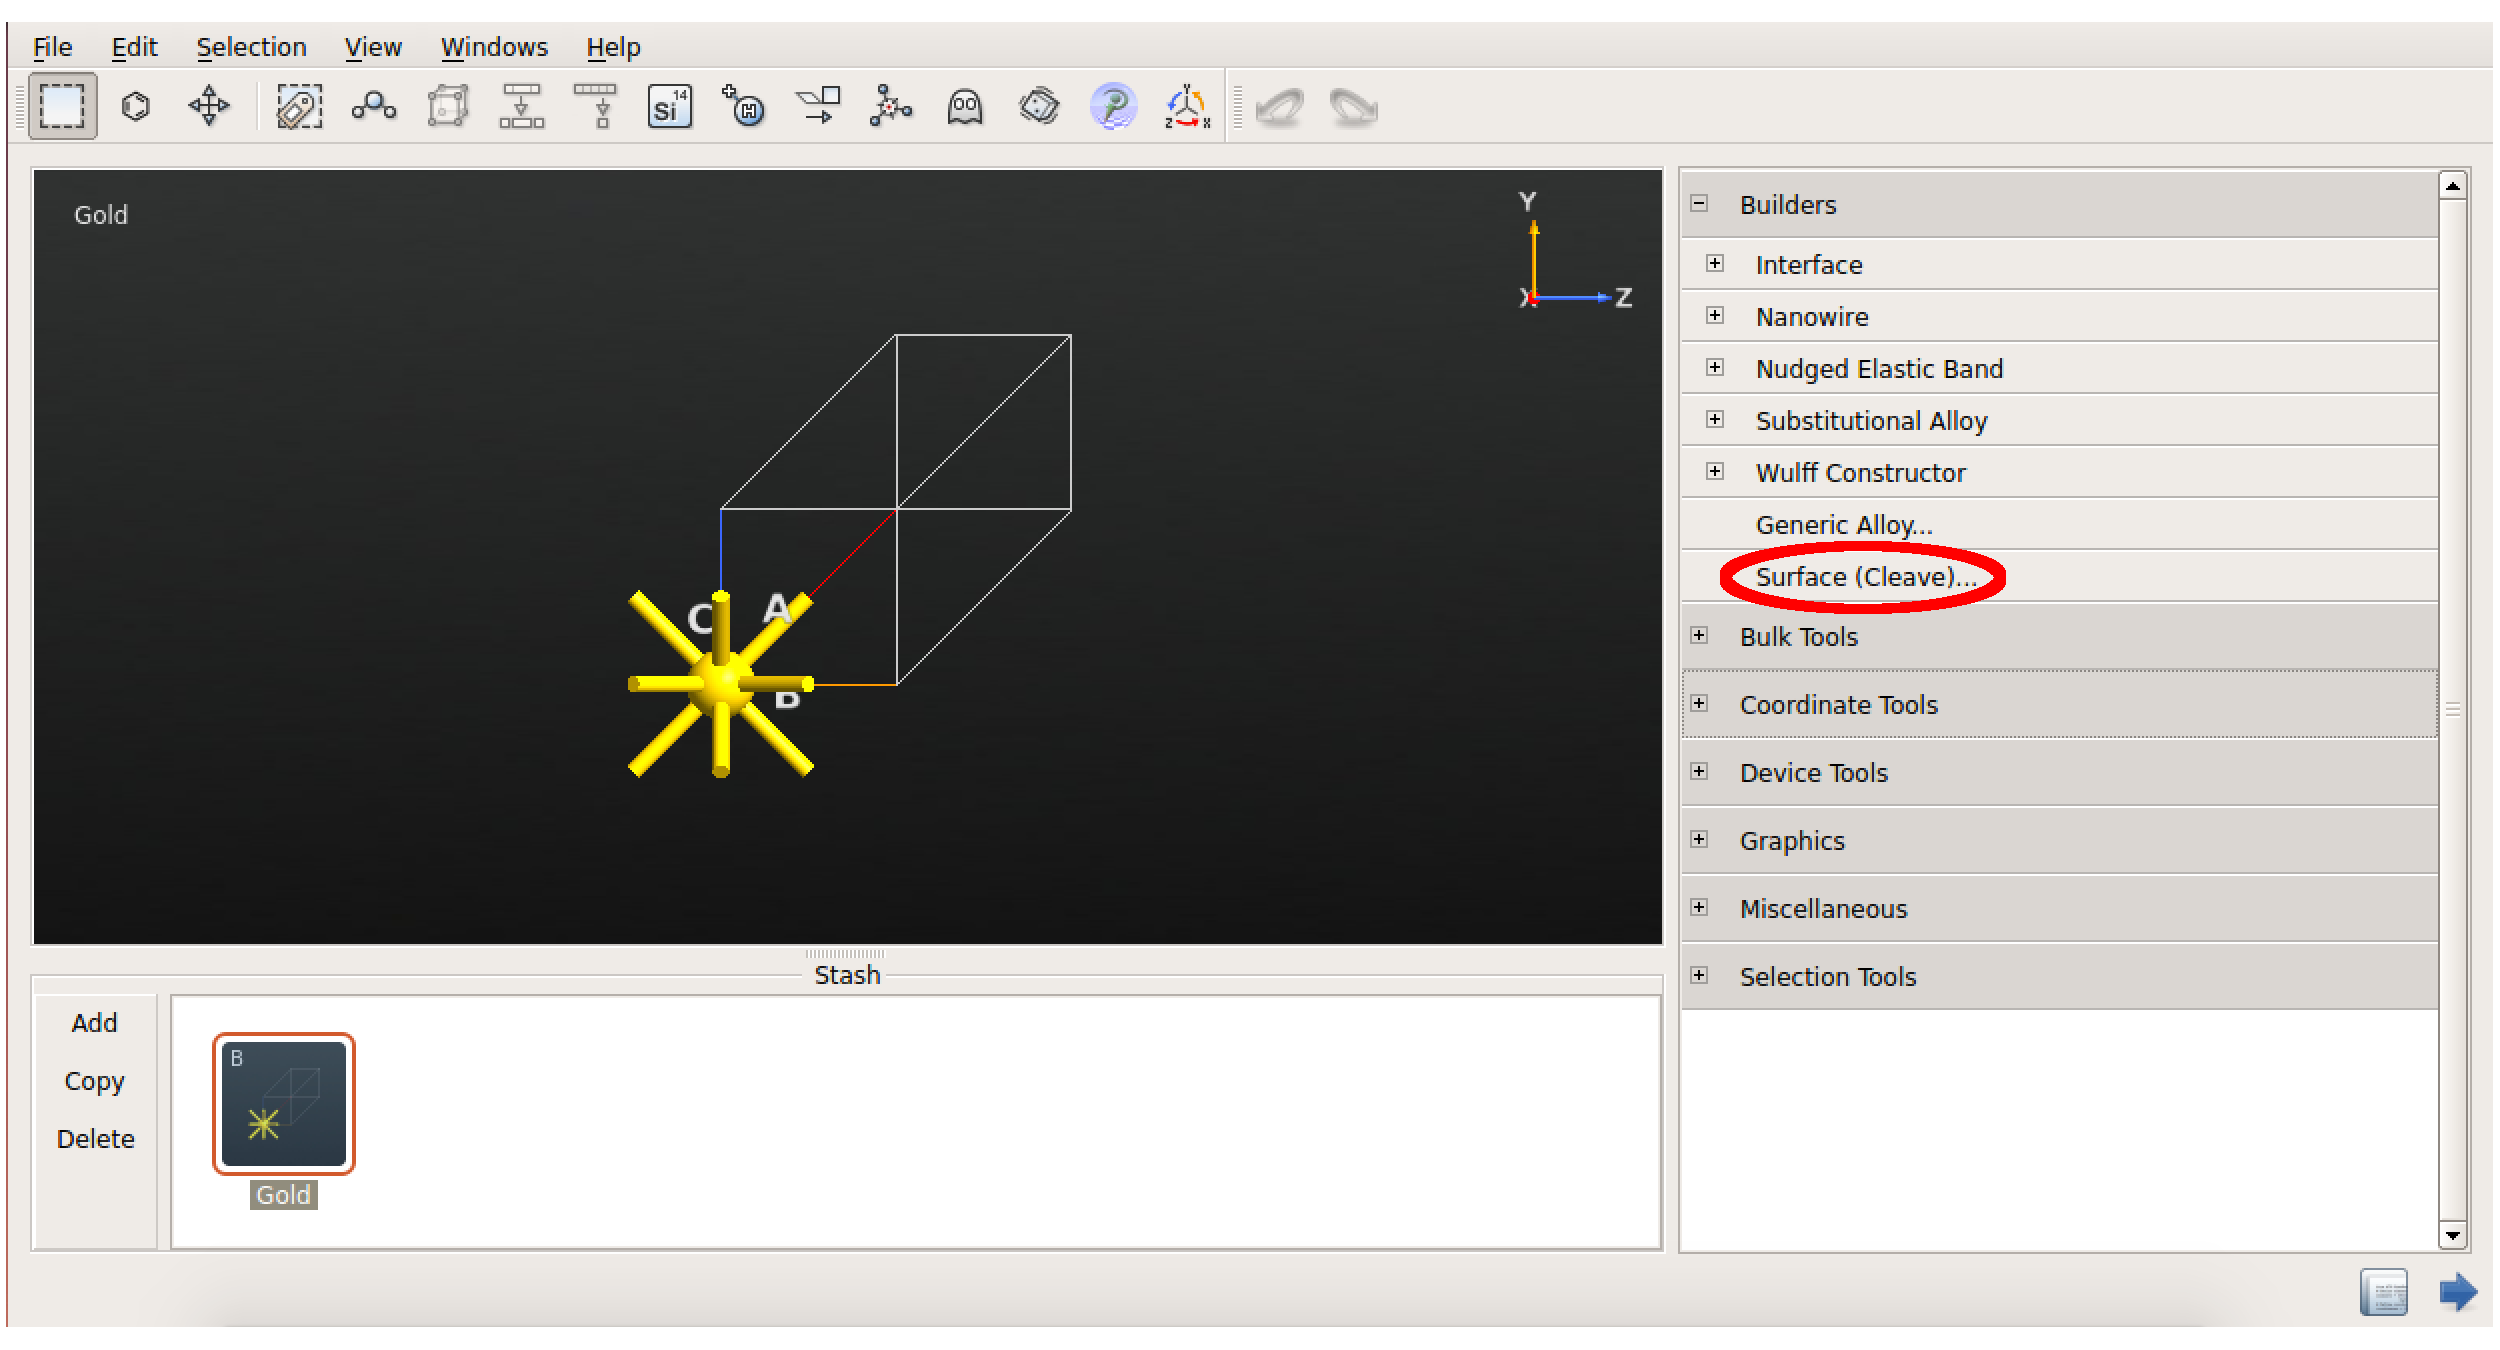
Next step is to cleave the bulk gold along the (111) direction in order to create a slab model of the Au(111) surface.
In the Builder,
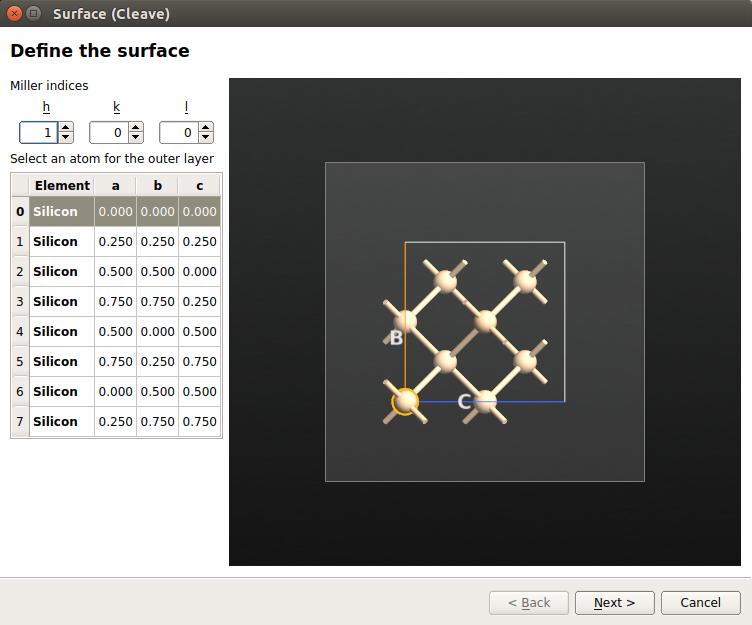
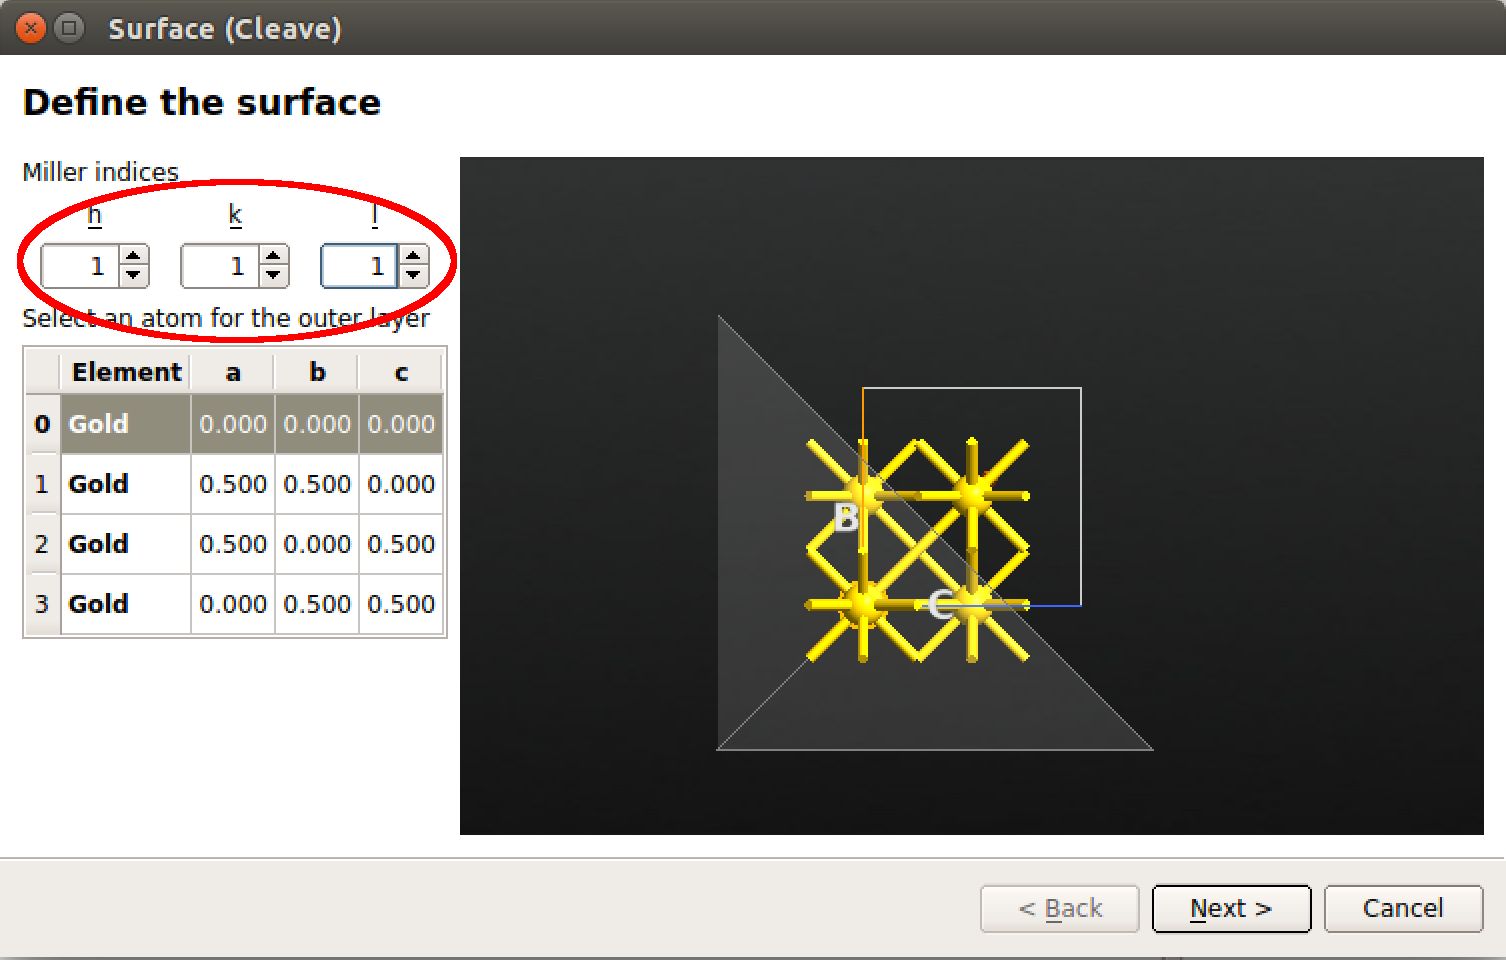
use the plugin to cleave
the Au crystal using the Miller indices \((h,k,l)=(1,1,1)\):
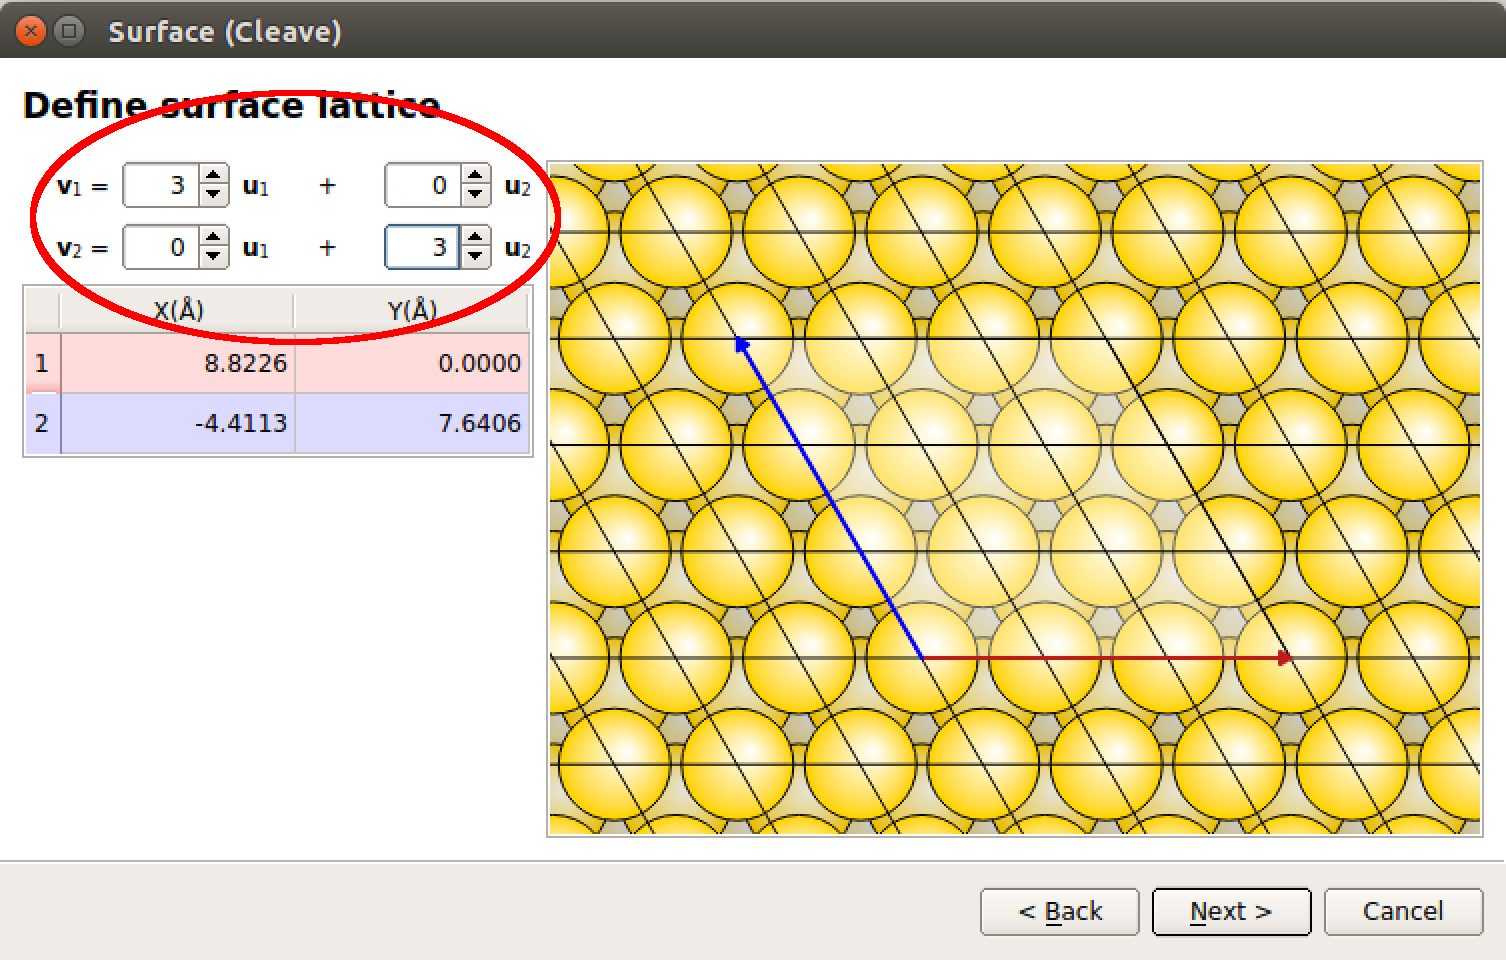
The default supercell lateral size is 1\(\times\)1. This is sometimes sufficient, but in the present case we aim for a 3\(\times\)3 slab in order to minimize in-plane interactions between neighboring Bz molecules.
Therefore, increase the lengths of the lattice vectors \(\mathbf{v}_1\) and \(\mathbf{v}_2\), such that
\(v_1 = 3u_1 + 0u_2\)
\(v_2 = 0u_1 + 3u_2\)
Tip
You can also modify the lattice vectors interactively by using the mouse to manually displace the red and blue vectors in the right-hand window showing the in-plane cell.
Finally, use the drop-down menu to select the out-of-plane cell vector \(\mathbf{v}_3\) to be Non-periodic and slab-like such as to model a surface with vacuum above and below it. Also increase the Top vacuum to 20 Å and the slab Thickness to 6 layers, as shown in the figure below.
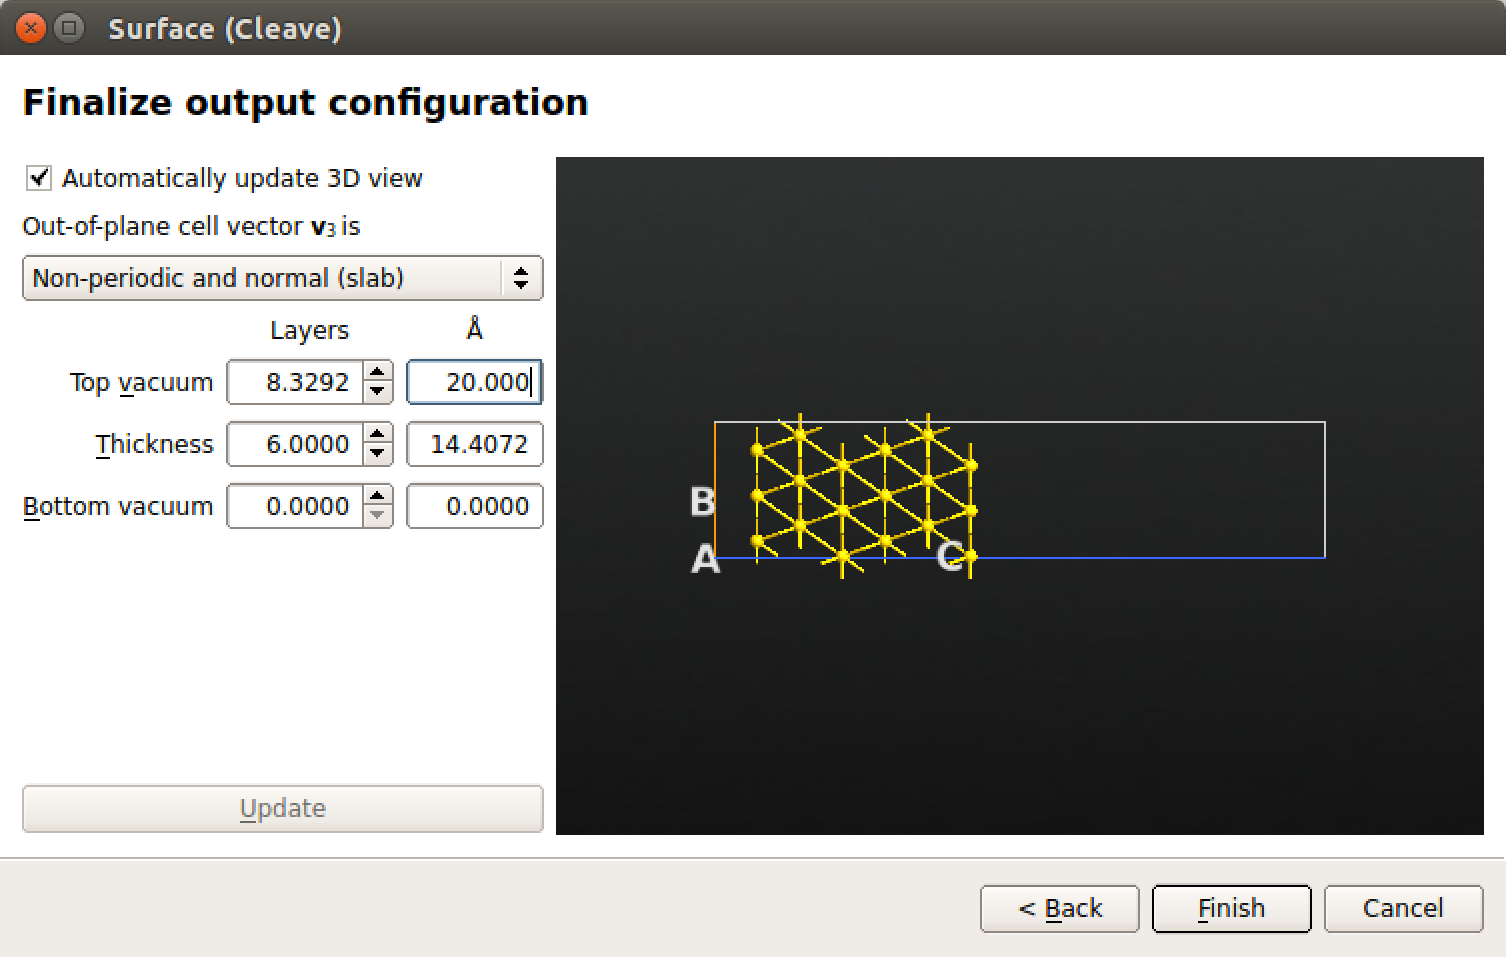
Once you are done, click Finish to add the Au(111) slab configuration to the Stash and close the plugin widget.
Attaching benzene to Au(111)
The final step is of course to attach a benzene molecule to the Au(111) slab. We will first aim for the hcp-30\(^\circ\) configuration reported in [1].
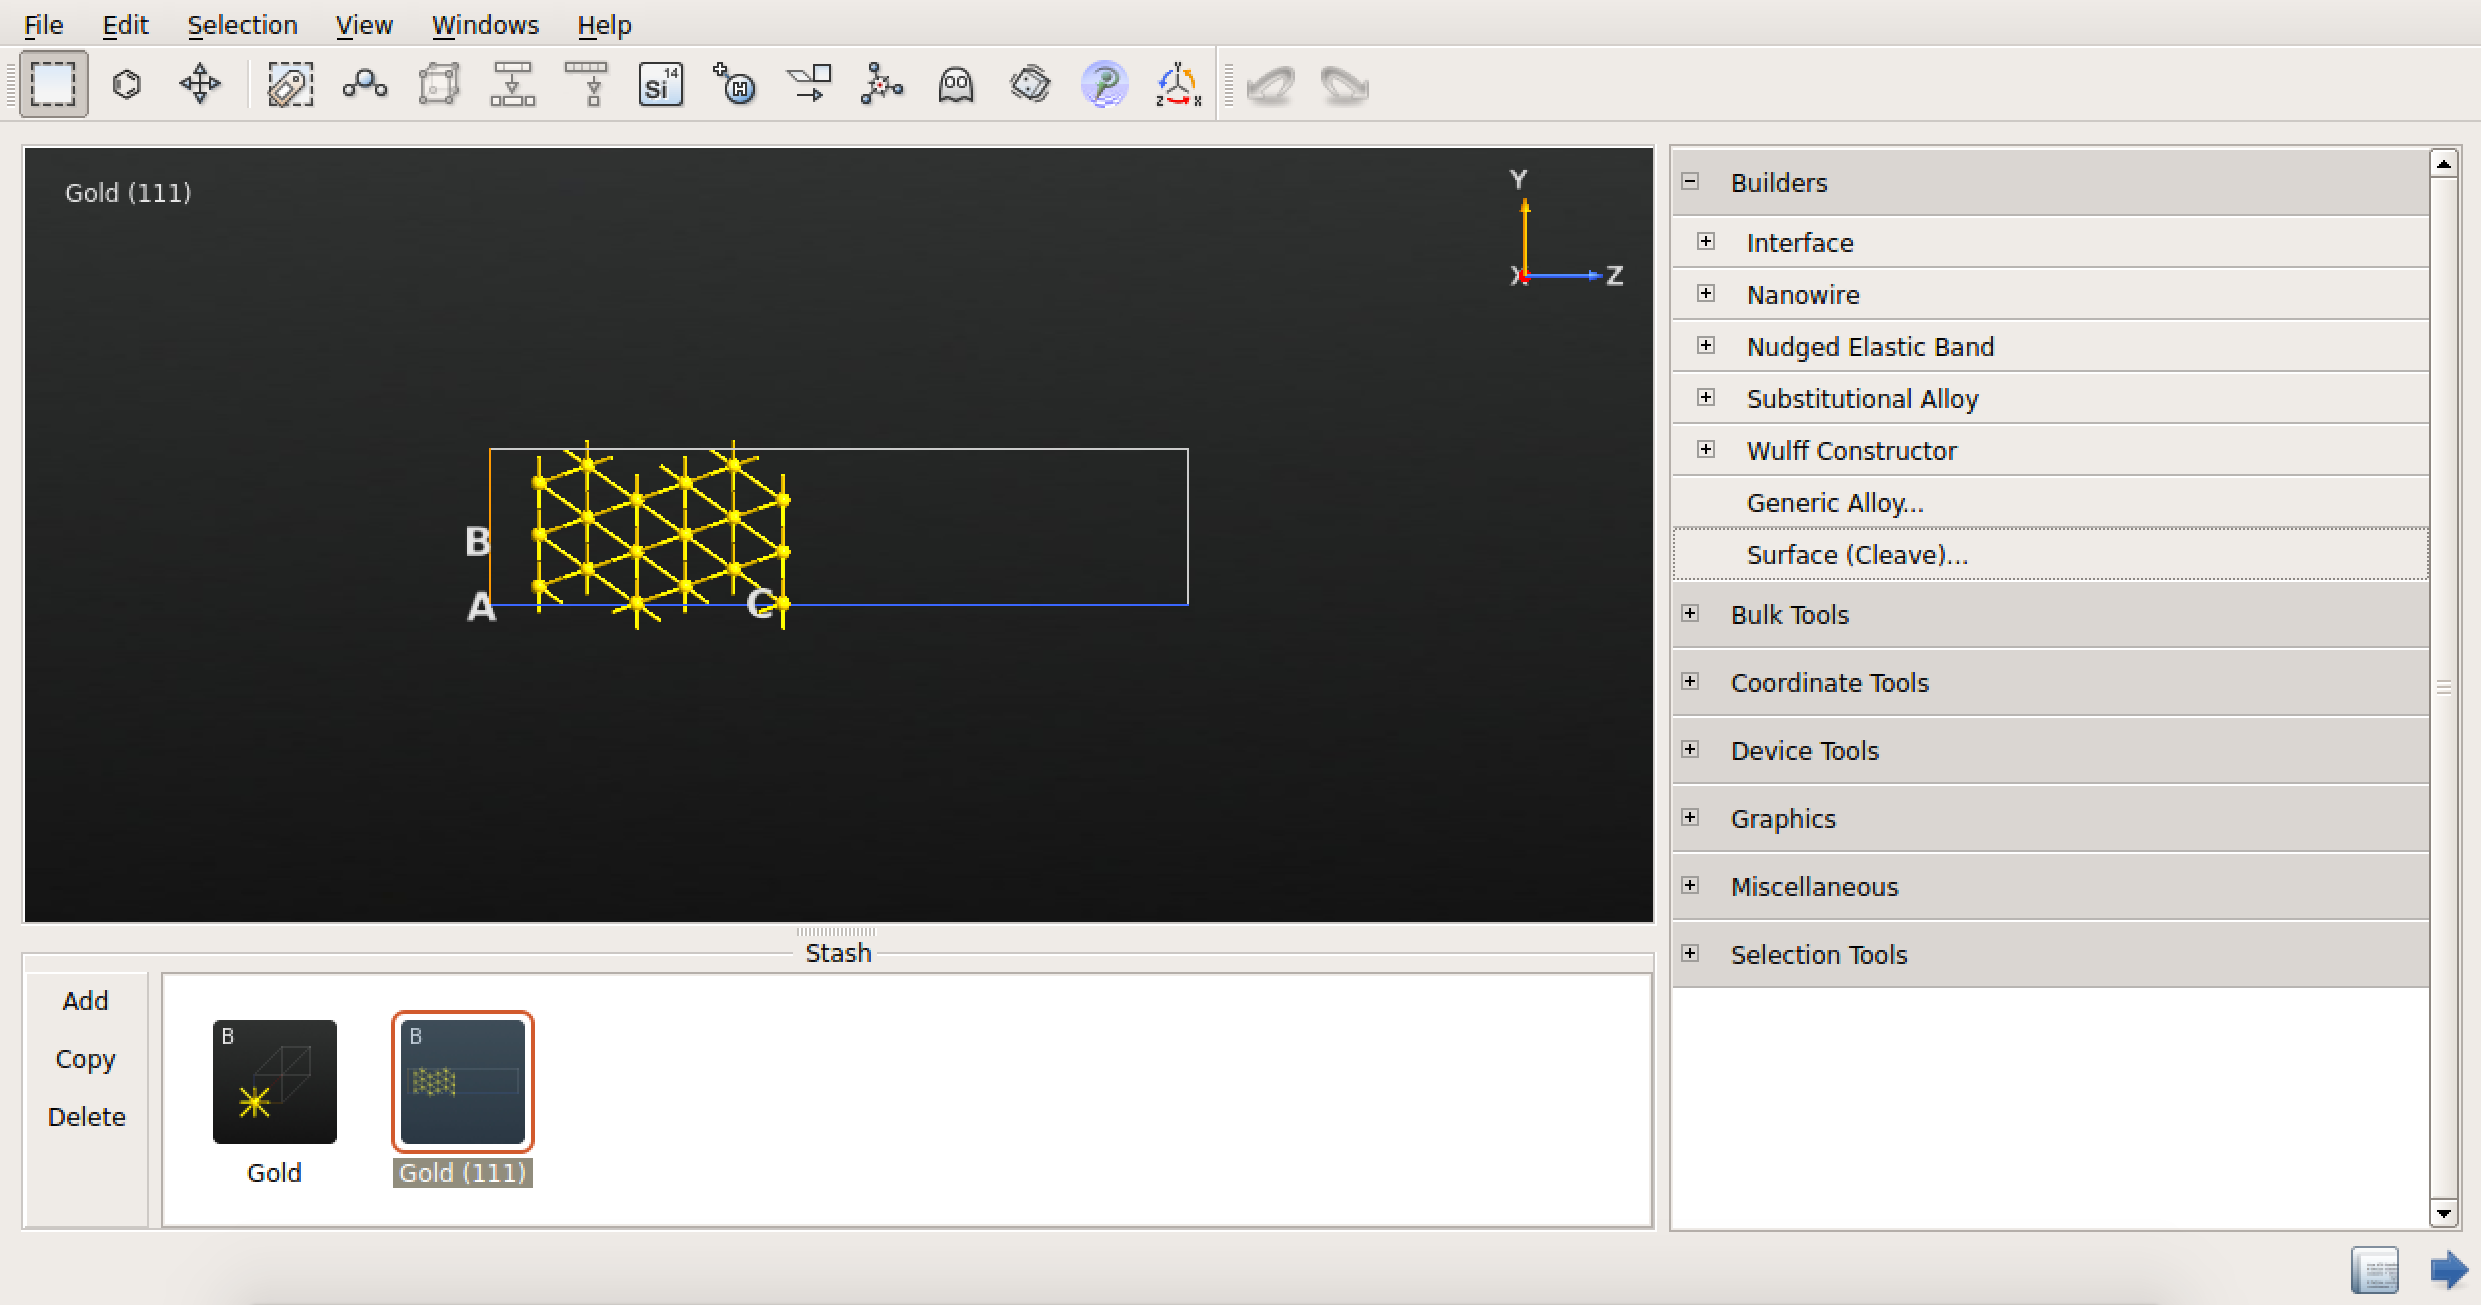
Select the “Gold(111)” Stash item and rename it to “Au(111)” by using mouse right-click or F2 on the keyboard. Then create a copy of the item, again using mouse right-click. Rename the copy “hcp30”.
In the Builder,
click the icon to open the Molecular Builder.
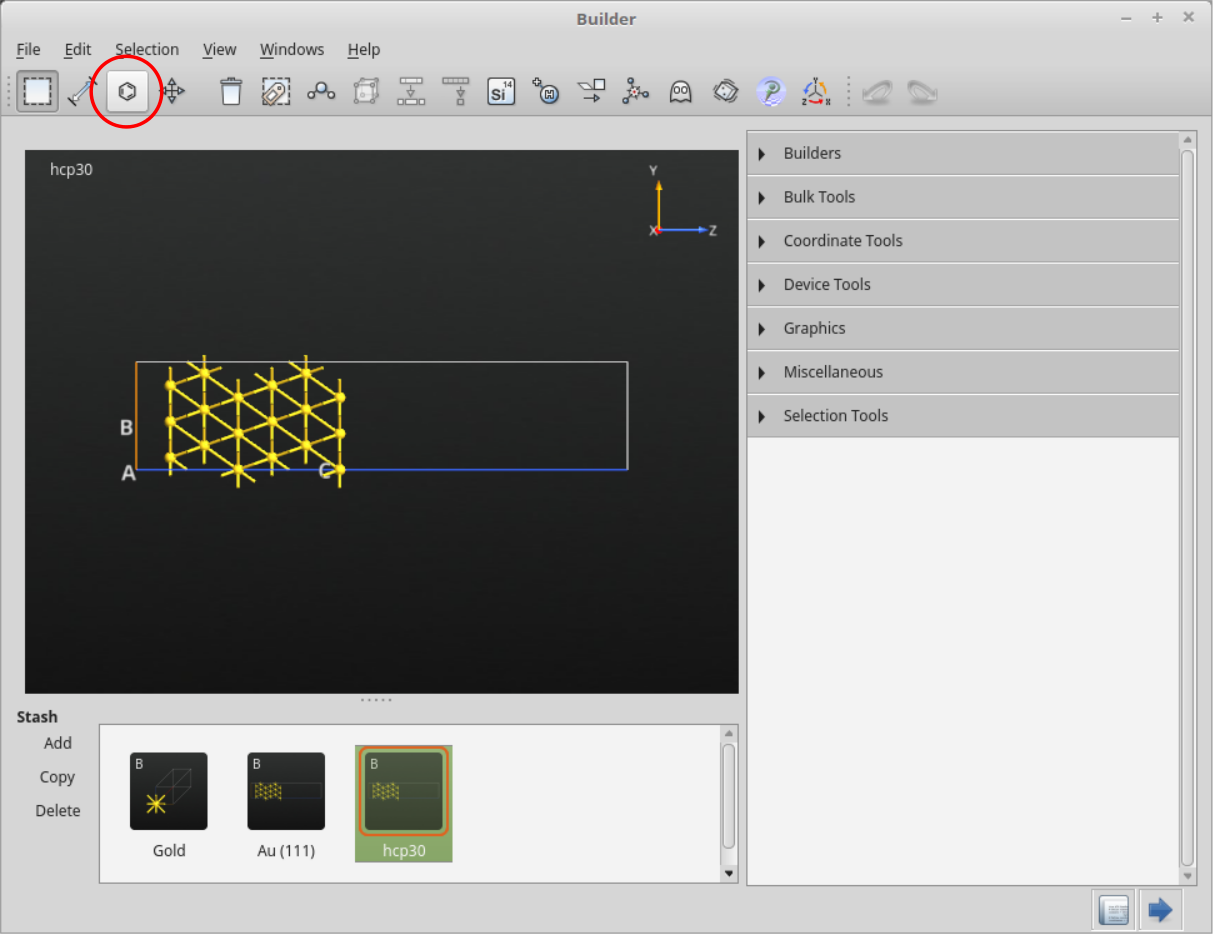
In the Molecular Builder, select from the drop-down menu.
You can now insert the benzene molecule into the Au(111) configuration: Click somewhere in the Au(111) vacuum region to place the molecule there. Then close the Molecular Builder widget.
Warning
Take care to click only once to add the Bz molecule to Au(111). For each click, a new molecule will be added at exactly the same position, so that it’s atoms will overlap with those of the already existing molecule!
Remember that you can always check for the presence of overlapping atoms by using the plugin and choosing a relatively small threshold (for example, 0.001 Å).
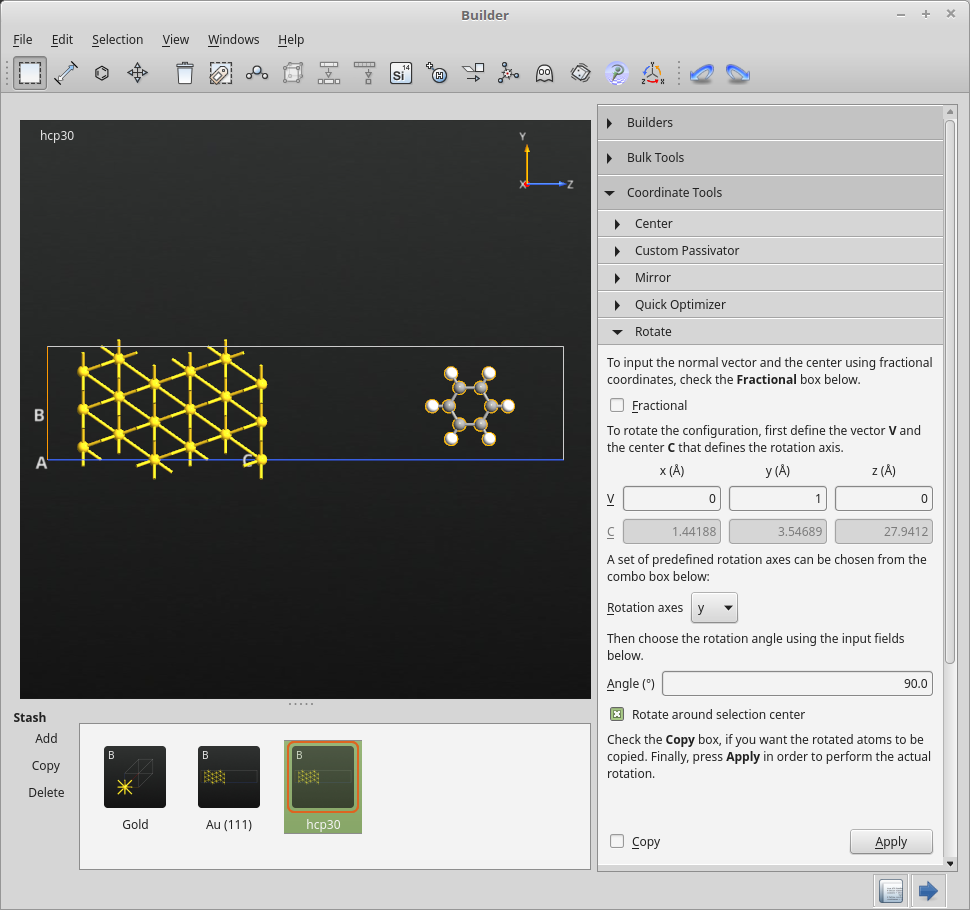
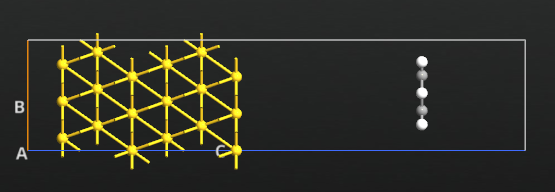
You will then need to rotate the molecule 90\(^\circ\). First select all Bz atoms by using the mouse to draw a rectangle around the molecule. Then open the plugin. Set the rotation axis to “y” and the rotation angle to 90\(^\circ\), and make sure the check-box Rotate around selection center is ticked. Click Apply to perform the rotation.
Next step is to move the Bz molecule into position in the hcp-30\(^\circ\) adsorption site.
First, make sure all Bz atoms are selected. Then click the
icon to add a new atom in at the geometrical center of the molecule.
You will use this anchor atom to “snap” the molecule into position above the surface.
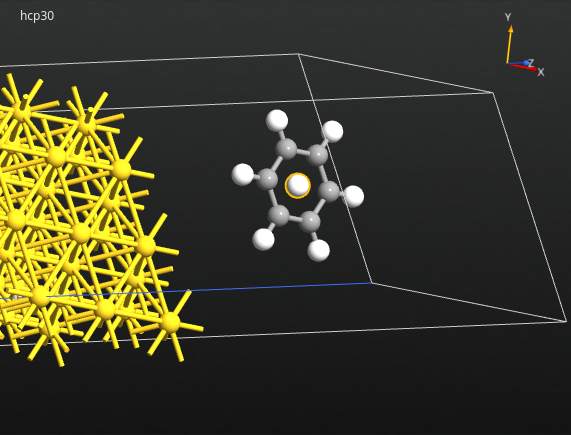
Select again all benzene atoms, including the extra atom, and rotate the view such that you see a top-view of the configuration.
Tip
The  Camera tool may be useful: Select the XY view plane
to get a perfect view down along the z-axis.
Camera tool may be useful: Select the XY view plane
to get a perfect view down along the z-axis.
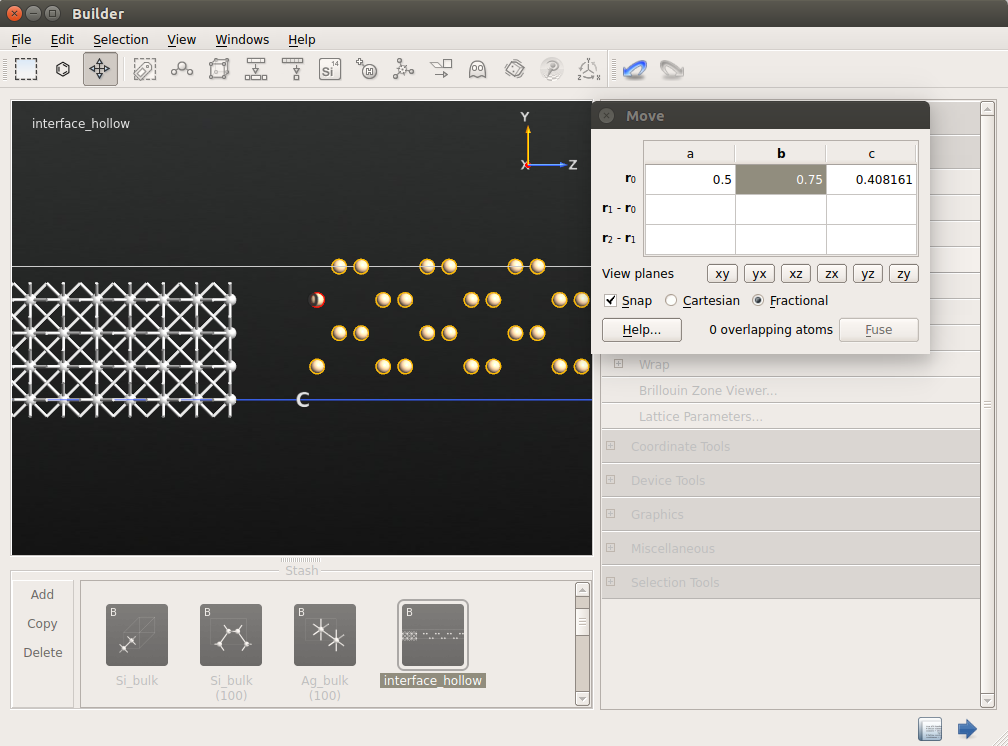
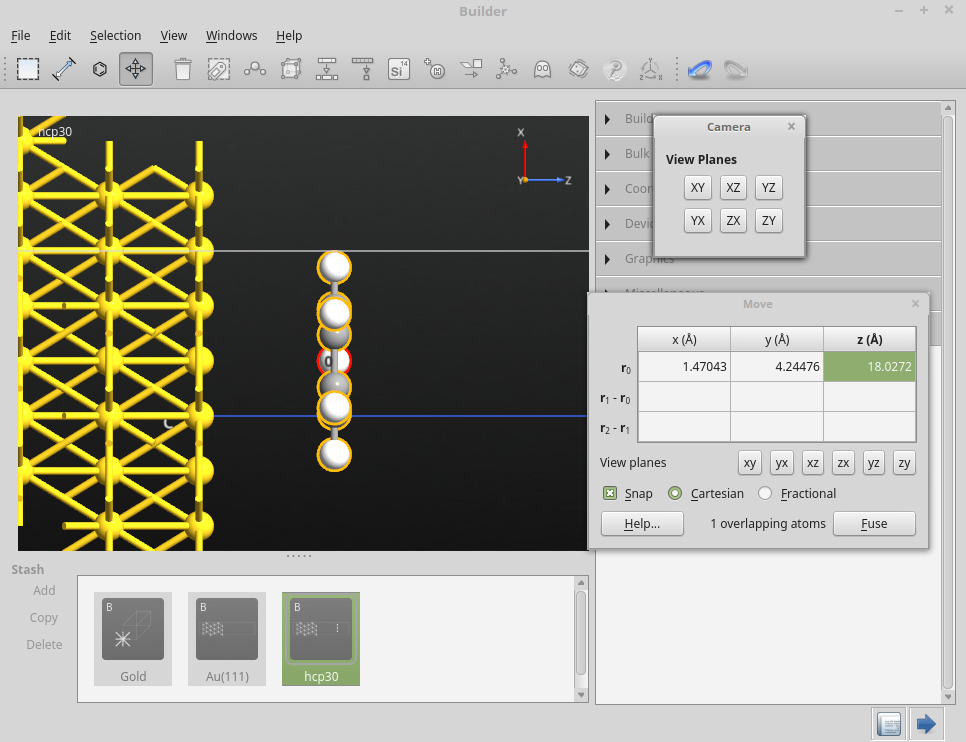
Click the icon to open the Move tool, and then click the extra
“snap-atom” in the middle of the molecule to select it as an anchor atom.
The selection shade should change color to red.

In the Move panel, make sure that the Snap option is selected. Use then the mouse to drag the molecule by the anchor atom, and drop it such that the anchor atom snaps onto a gold atom in the second slab layer.
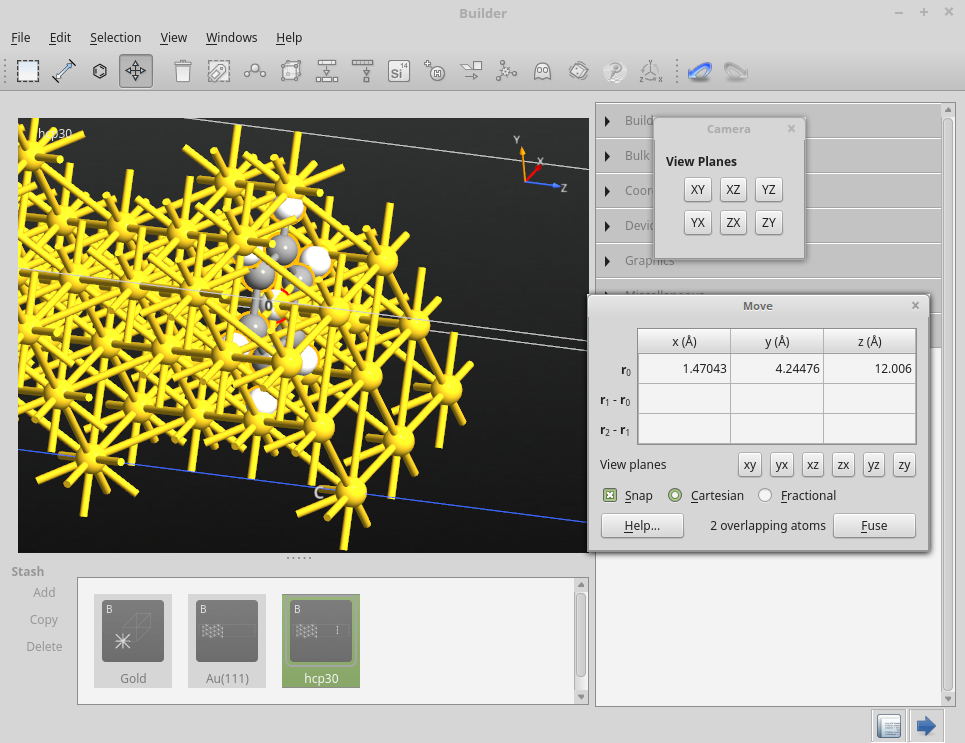
Finally, adjust the molecule–surface distance such that it matches the 3.62 Å reported in [1]: In the Move panel, enter 18.0272 Å for the z-coordinate of the anchor atom position \(r_0\), as shown in the figure below.
Note
In general, to set the desired molecule–surface distance, you of course need to first know the cartesian coordinate Z of the Au topmost layer. This can be done by simply hovering the pointer above one of the atoms of the Au(111) topmost layer.
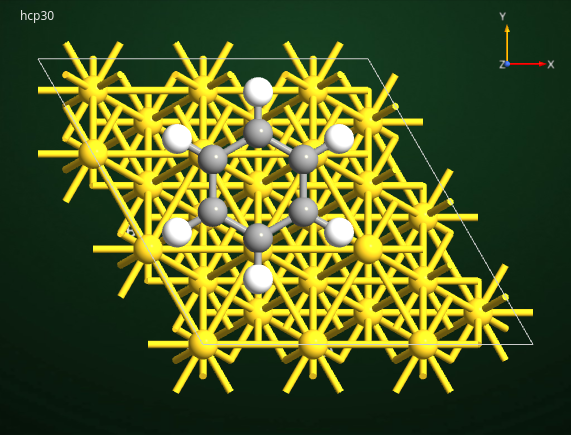
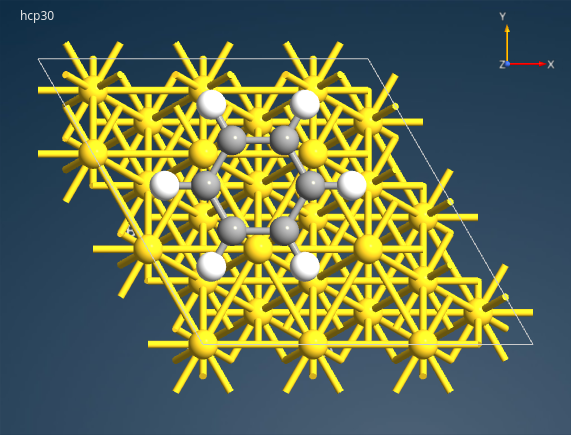
Finally, remove the anchor atom by selecting it and deleting it. Your “hcp30” configuration should now look like this:
Tip
You may save the configuration as an ATKPython script, or export it to a range of popuar file formats.
Creating the hcp-0\(^\circ\) configuration
The hcp-0\(^\circ\) adsorption configuration is simply related to the hcp-30\(^\circ\) one by a 30\(^\circ\) rotation of the benzene adsorbate (assuming constant Bz–Au(111) distance).
First, copy the “hcp30” Stash item and rename the copy to “hcp0”. Then select all benzene atoms in the newly created copy, and open once again the plugin.
Apply a rotation of 30\(^\circ\) around the z-axis, which is normal to the surface plane. The “hcp0” configuration should now look like this: